
Overview
From real-time chat to video meetings, document management, and more, Microsoft Teams is a powerful platform for project management.
This guide covers everything you need to know about using Microsoft Teams for project management and teamwork. The question to ask is not – ‘’Is Microsoft Teams a project management tool?’’ The right questions are: can you do project management with Microsoft Teams or how to use Teams for project management?
We’ll show you how to create your first Team, leverage chats, and run great video meetings. You’ll also see how the BrightWork Marketing Team combines Teams with a SharePoint project site for communication and collaboration.
Getting Started with Microsoft Teams
What Does Teams Offer?
-
Real-time chat and messaging
-
Video conferencing and meetings for up to 300 people
-
Live events for up to 20,000 people
-
Cloud calling
-
Document storage
-
Real-time co-editing
-
Integration with third-party apps and connectors
-
Search
-
Public or private channels
-
Task management
-
Robust security and privacy capabilities.
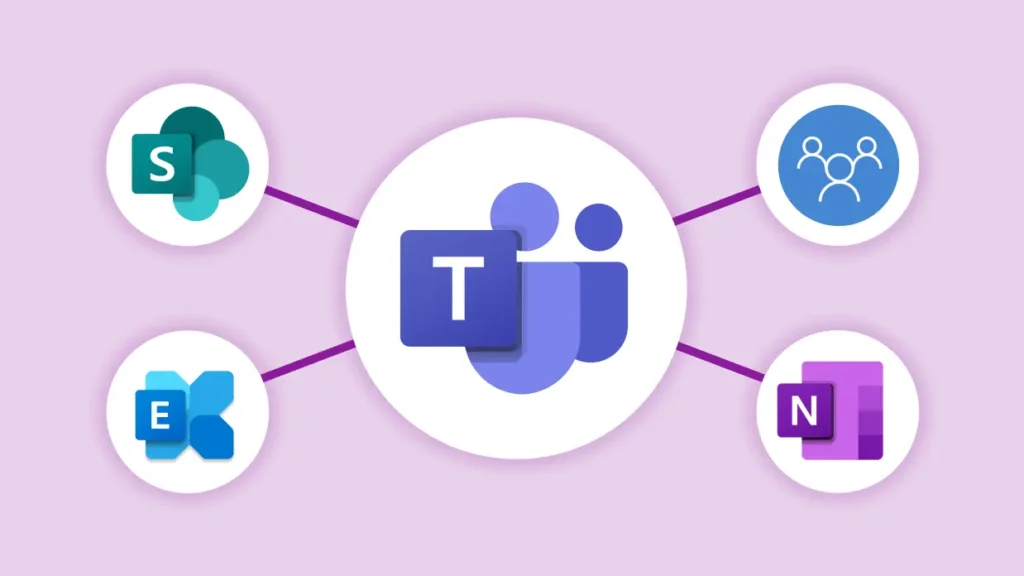
Teams is built on the Office 365 Groups framework and the Microsoft Graph, bringing various collaboration tools within the Microsoft ecosystem into one location. The solution creates a single collaborative experience for modern project teams.
Each team comes with:
-
A SharePoint Online site, including a document library.
-
A new Office 365 Group.
-
An Exchange Online mailbox and calendar.
-
A OneNote notebook.
Each Team is made up of:
-
Individual teams, a collection of people, conversations, and files, for example, a project.
-
Channels within a team. These are typically focused on a particular topic within a project.
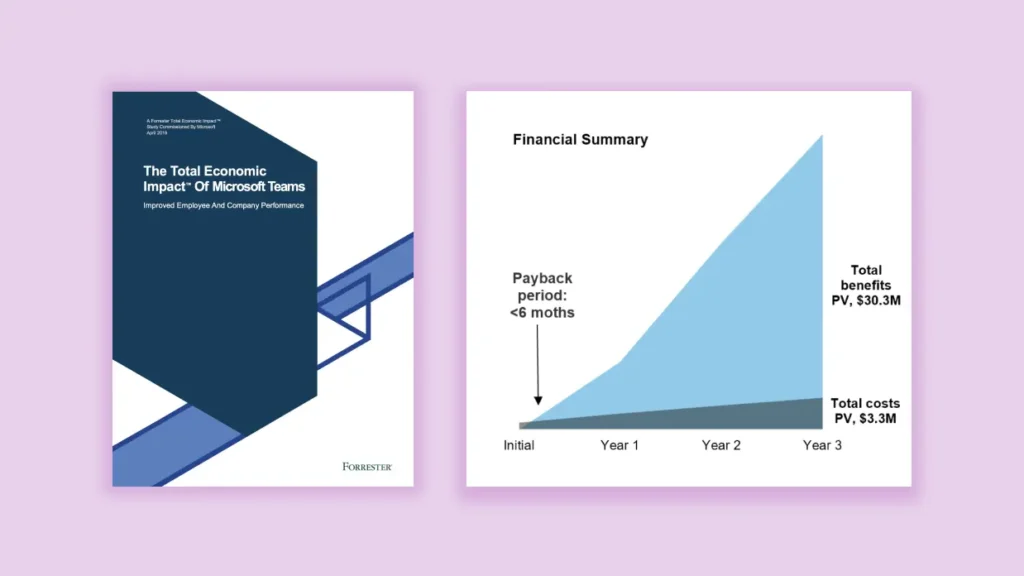
The Economic Impact of Teams
A report conducted by Forrester on the economic impact of Microsoft Teams found:
-
Teams reduces the number and duration of meetings and business travel.
-
Organizations can easily replace numerous hardware and software communication solutions, like video conferencing and on-premises phones, with Teams.
-
With easy access to information in one place and less time wasted switching between apps, Teams save workers up to four hours per week.
-
Teams enables remote working with various collaborative capabilities and shared document storage. In turn, this accelerates decision-making and increases productivity.
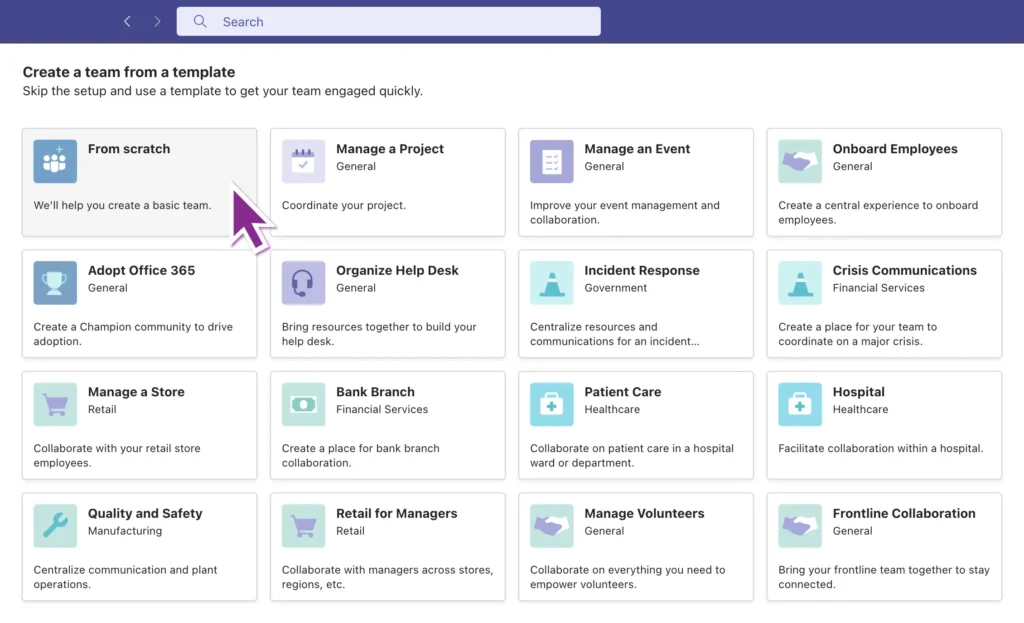
Creating Your First Team
If you are accessing Teams via Microsoft 365, you can use the web app or download the software to your desktop. Note – the desktop app includes more functionality than the web app.
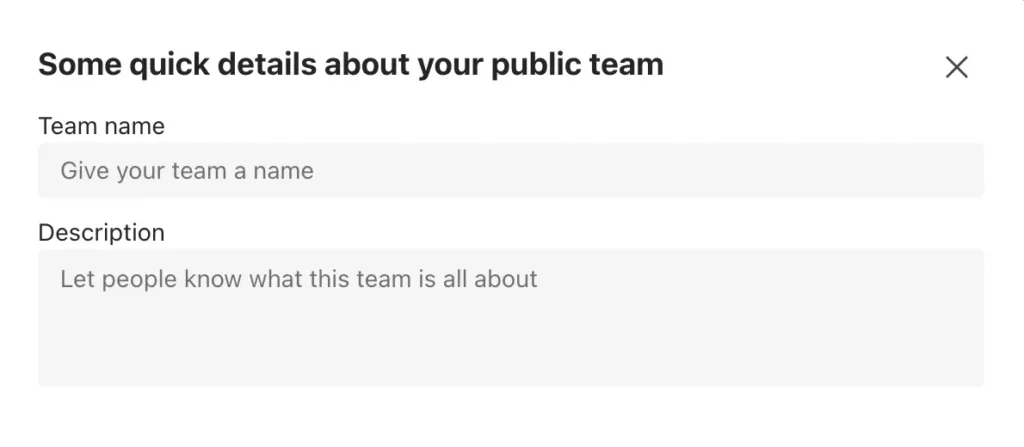
Take care with the name of your team and channels as these become the names of the associated SharePoint site, file library, and Outlook email address. You can change the name of a team or channel if needed, but the original name is retained in SharePoint and document links.
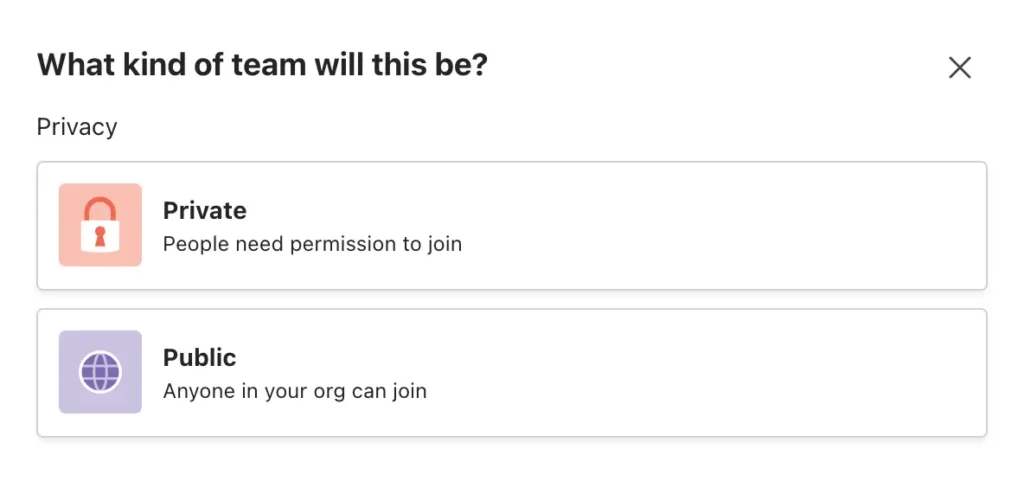
It’s also worth checking that a team with the same name does not already exist. In the case of duplicate teams, a random number is simply added to the name of the site collection. A team can be private or public The team owner can switch between these settings as needed. Users must be invited to a private team by the team owner. Anyone within an organization can join a public team.
Complete your team by:
-
Adding team members.
-
Creating channels – explained in the next section.
-
Uploading or creating new files.
-
Adding tabs, including Planner and SharePoint.
-
Connecting third-party and apps.
Adding Your First Channel
Channels are a useful way to facilitate collaboration in key areas of a project, for example, a workstream, within a team. Think of channels as a mini team, with conversations, calls, files, and other capabilities of Teams, within the overall team.
All members in a team can access and use channels in a team, including conversations and files. When creating a channel, update the settings so your team can see the channel! Every team includes a General Channel, which cannot be deleted or renamed. To keep your team engaged with daily work and specific areas of a project, create channels and avoid using General. Users can add 200 public channels and 30 private channels to a team.
To create a channel, click the settings menu within the team, and follow the on-screen steps. The channel appears as a folder within the SharePoint document library for the team. Files stored in a channel are also stored within this folder. Use ‘Meet’ in the top right-hand corner to start or schedule a meeting within the channel.
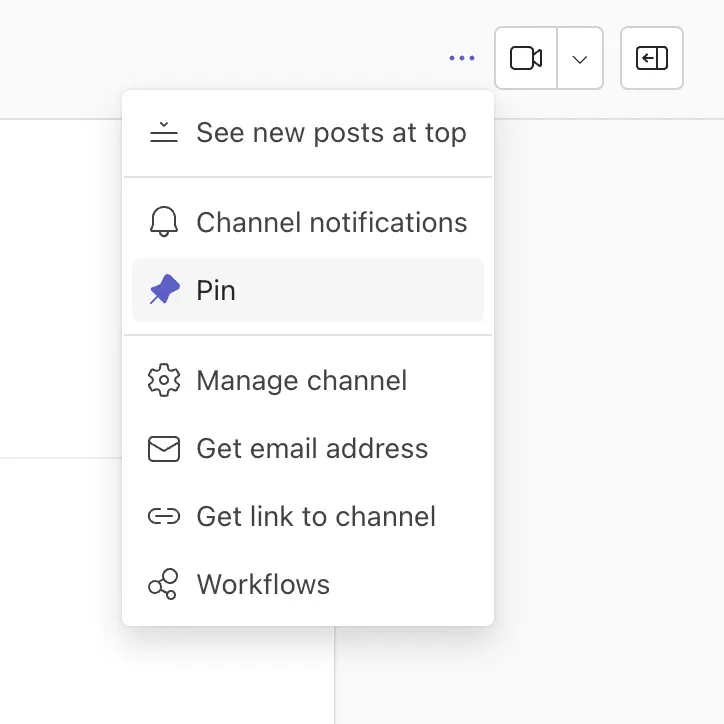
Managing notifications for a channel is quite straightforward, with options to switch notifications on or off; pin a channel for quick access, or hide a channel. Not sure who has access to content in a Channel? Check the visibility icon on the top menu. Access is noted as ‘Team’, ‘Org’, or ‘Guest’.
Private Vs Public Channels
There are two types of channels in Teams:
-
Public, available to everyone in the team.
-
Private, available to invited members only. A private channel is indicated by a lock icon.
Private channels are a relatively new addition to Teams. The aim is to facilitate collaboration on sensitive information, for example, budget, with a small group of people within a team. A private channel uses a separate, lightweight SharePoint site collection for additional security. Users, including team owners, must be invited to a private channel. Non-members will not know the channel exists!
Each private channel has its own settings, which are independent of any settings within the parent team. Unlike a team, a private channel cannot be switched to a public channel and vice versa. Whilst private channels do play a role in controlling important data, they also create silos within a team. In many cases, a private Team may be more suitable.
Best practices for setting up project management channels
1. Define Clear Objectives and Structure
-
Objective Alignment: Clearly define the goals and purpose of each channel. Ensure all team members understand the intent and expected outcomes.
-
Channel Naming Conventions: Use descriptive and consistent naming conventions for channels to help team members quickly identify the objective of each channel. For example, use names like “Project-Updates,” “Design-Review and Backlog,” or “Marketing Tracker Updates.”
-
Standardized Templates: Set up templates for common project activities (e.g., meeting agendas, status updates) and store them in a dedicated channel or tab for easy access.
2. Organize Channels by Project Stages or Functions
-
Phase-Based Channels: Set up channels corresponding to different project phases such as “Initiation,” “Planning,” “Execution,” “Monitoring,” and “Closure.” This helps in organizing discussions and documents according to the project timeline.
-
Function-Based Channels: Create channels based on project functions or workstreams like “Development,” “Marketing,” “Finance,” etc. This allows team members to focus on specific areas relevant to their roles.
3. Utilize Tabs and Apps
-
Tabs for Other Resources: Add tabs to channels for quick access to important documents, spreadsheets, and project plans stored in OneDrive or SharePoint. For example, add a “Project Plan” tab that links to the project’s timeline document.
-
Integrate Project Management Apps: Use apps like Planner or Project for task management, Trello for Kanban boards, and OneNote for collaborative note-taking. Integrating these tools within Teams channels streamlines workflows.
4. Encourage Collaboration
-
Conversation Threads: Encourage the use of threaded conversations within channels to keep discussions organized and ensure context is preserved.
-
@Mentions/Tags: Use @mentions to grab the attention of specific team members and tags for groups. Create custom tags for roles or functions (e.g., @Developers, @Managers) to streamline communication.
-
Meetings: Schedule regular check-ins or stand-up meetings within the relevant channels to keep everyone updated on progress. Use the “Meet Now” or scheduled meetings feature for instant or planned discussions. Check the calendar to get a full view of your scheduled meetings.
5. Manage Permissions and Governance
-
Channel Permissions: Set appropriate permissions for each channel to control access to sensitive information. Use private channels for confidential discussions.
-
Governance Policies: Establish clear governance policies regarding channel creation, document management, and data retention. Ensure all team members are aware of these policies to maintain order and compliance.
6. Automate Processes
-
Automation with Power Automate: Use Power Automate to create workflows that automate repetitive tasks such as notifying team members of new tasks, updating project status, or archiving completed projects.
-
Bot Integration: Integrate bots like the Teams bot or custom bots to help with tasks such as scheduling meetings, providing reminders, or pulling in data from other systems.
7. Training
-
Training Sessions: Provide training sessions for team members on how to use Teams effectively, including channel setup, document sharing, and task management.
-
Support Resources: Maintain a support channel or resource hub where team members can find FAQs, tutorials, and guidelines on using Teams for project management.
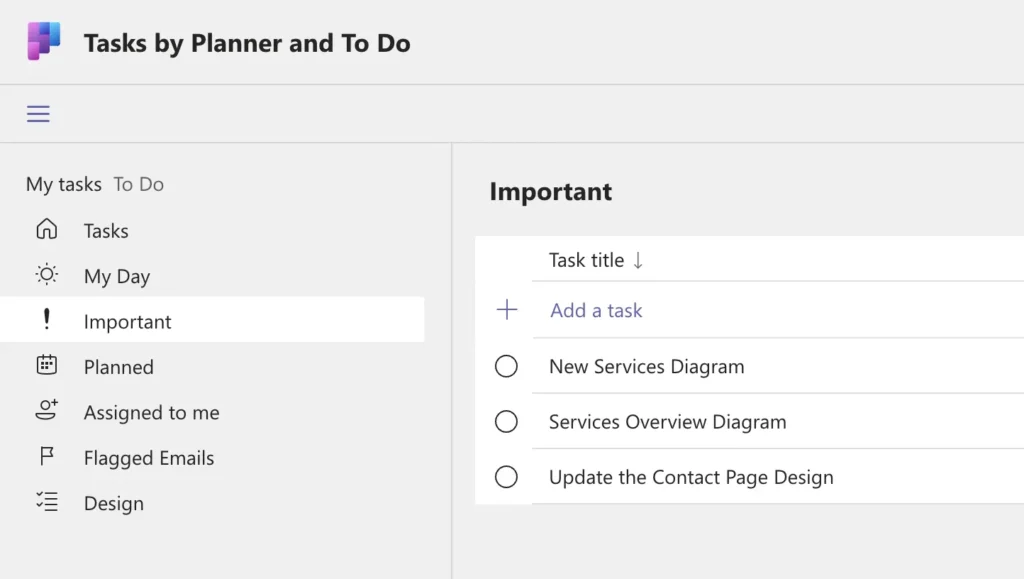
Tasks in Teams
Tasks in Teams combines project tasks from To Do, Planner, Outlook, and Office (Word, Excel, and PowerPoint), allowing teams to manage their work in one place. is part of Microsoft’s unified vision for tasks in Microsoft 365, based on three principles:
-
Coherence: Task management will have a consistent experience across the Microsoft 365 ecosystem.
-
Intelligence: Users can leverage intelligent services like the Microsoft 365 Graph or MyAnalytics to manage and prioritize work.
-
Integration: Tasks are connected to one of two task-management apps – To Do or Planner. Tasks for Teams allows users to access both apps in one place.
To add Tasks to Teams, click on the three ellipsis icon on the left side navigation bar or search for the Tasks app in Apps. The app is available on desktop, mobile and online.
Permissions and Privacy
As part of Microsoft 365, Teams delivers a high level of security, uptime, and scalability. As Teams is a single platform for collaboration, document management, and so on, it’s easier to conduct risk audits and enforce policies, for example, data retention.
However, permissions within Teams are somewhat limited, particularly when compared with SharePoint. Unlike SharePoint, you cannot assign a ‘read-only’ role to team members; everyone in the team is a content creator and editor. However, files are subject to the sharing and permission rules of SharePoint.
There are two main end-user roles in Teams: owners and members.
A team owner:
-
Creates the team and has control over settings.
-
Can add new members, including external guests.
-
Can delete or restore a team.
-
Can restore deleted files.
-
Has the ability to connect third-party apps to a team.
-
Can add tabs to a channel.
-
Although one individual creates the team, it is advisable to ‘promote’ another team member to owner. This way, an owner is always available to help team members, for example, add a new user. To assign a role, select the team name and click More Options → Manage team. Use the drop-down menu beside the relevant individual’s name to change their role.
Team members:
-
Cannot access or change the team settings, or add new team members.
-
Can upload and edit files and libraries.
-
Can add – but not delete – channels.
-
Have the ability to connect third-party apps to a team.
-
Can add tabs to a channel.
For full details on the capabilities of each role and external guests, see this summary table from Microsoft. It’s worth noting files shared in a private chat are stored in OneDrive for Business, rather than SharePoint, and are only accessible to participants in that chat. For this reason, it’s best to add files to the main Files tab in a channel and share a link in a chat.
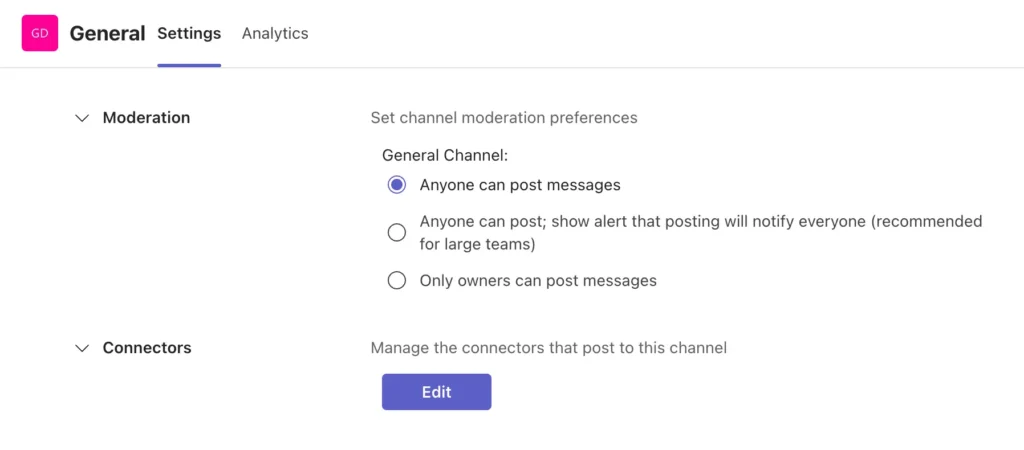
If you do need to manage posts in a channel carefully, switch on the moderation option under settings. Moderators can start new posts in a channel and decide whether team members can reply to messages. Guest access allows anyone who is external to your organization and who has a business or consumer email account to participate as a guest in Teams with full access to team chats, meetings, and files.
However, guest users cannot:
-
Create or edit a Team
-
Search for a Team
-
Share files in a one-to-one chat.
Governance In Microsoft Teams
Microsoft Teams has a low learning curve and will quickly become part of your project management process. Depending on administration settings, Teams is easy to get up and running.
This ease of use can also cause problems. Without agreed guidelines on creating teams, you’ll quickly find yourself in multiple ‘ghost’ teams and too many conversations. Like any communication tool, document protocols for using Microsoft Teams in the project communication plan. These protocols should be defined within existing IT governance policies within your organization.
Think about:
-
Who can create a new team for a project or a new channel within a team?
-
Who can add third-party apps to a team or channel?
-
Who can create private channels and why?
-
Naming conventions for teams, channels, and files.
-
When to archive a team, for example, during project closure.
It’s important to balance flexibility with governance. If policies are too strict, your team will use other apps to collaborate – the opposite of what you are trying to achieve! For practical tips on security and governance in Microsoft Teams, check out our Glossary.
In the next section, you’ll read more about how the BrightWork Marketing Team uses Teams. For roll-out and governance, we initially encountered problems such as inactive teams, files in different places, and overlapping chats. Confusion was growing so we took the time to review our teams, move files as needed, and archived unused sites.
Now, we use one team for Marketing with multiple channels for daily work, projects, and workstreams. We also agreed to store documents in Teams and use BrightWork 365 for project management, task tracking, and reporting. This way, we always know where to find important files or project information.
These simple steps to improve Teams will save time and accelerate collaboration, particularly when working across different locations or time zones.
Project Management in Teams and BrightWork 365
For the Marketing team at BrightWork, Microsoft Teams has been part of our toolkit since 2017. We use Teams for everything from chat to video calls and file sharing. The solution allows us to work together as a team and on a one-to-one basis as needed. However, Microsoft Teams is not designed for project management.
While you can add various apps to a site, there is no way to track tasks, identify risks, allocate resources, or report across projects. It’s also impossible to configure Teams to match the needs of a particular team or project.
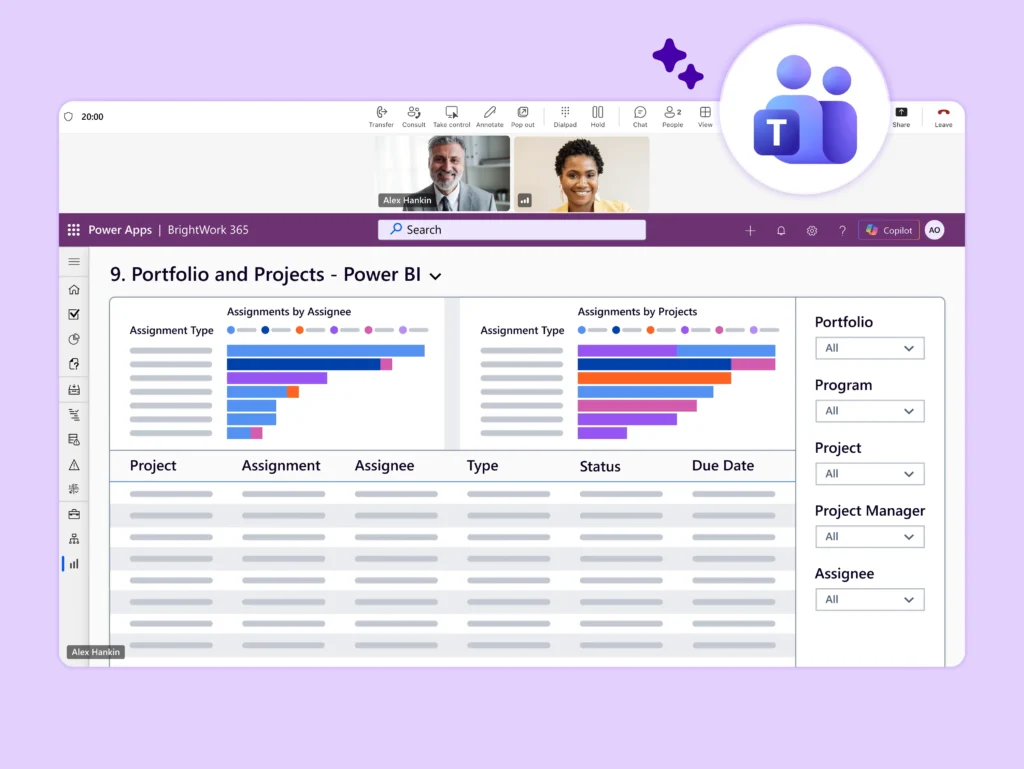
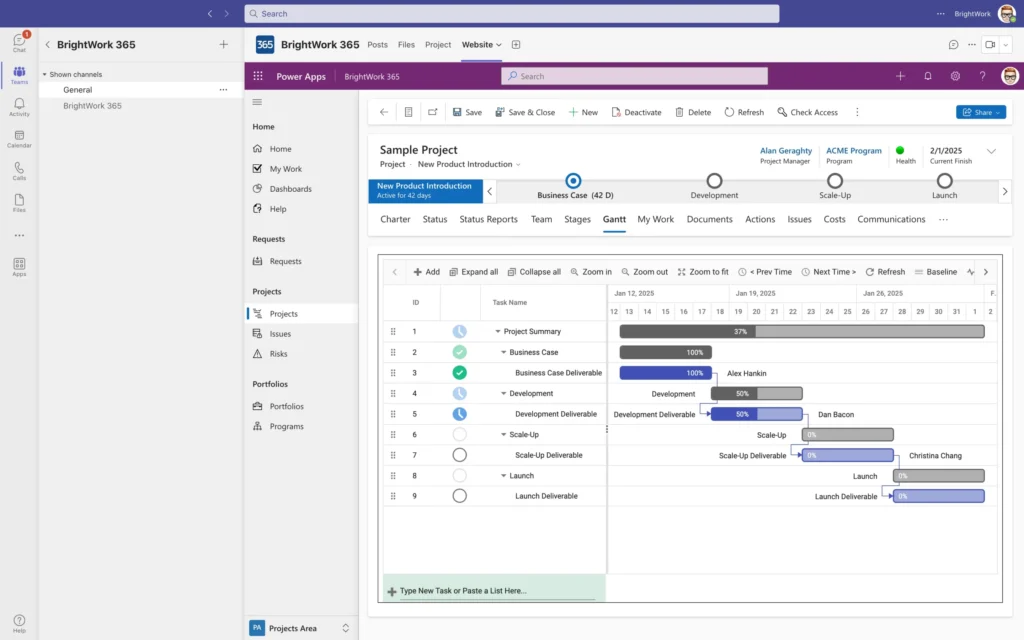
BrightWork 365, a PPM solution for Microsoft 365, solves these problems with a direct integration with Microsoft Teams. In BrightWork 365, every program has a dedicated Microsoft Team. Every project within the program has a channel within that Team, added during project setup. The app is located in the Charter tab in the relevant Team channel. You can rename the tab as needed, for example, Project Site.
Using this seamless integration, our team can manage projects, store deliverables, and collaborate in one place with:
-
Project templates
-
Task and Work Management
-
Interactive Gantt chart
-
Status Reports
-
Power BI dashboards for projects, programs, and portfolios.
Project Planning Using Microsoft Teams
Setting clear goals and objectives is crucial for successful project planning, and Microsoft Teams provides an ideal platform to manage project planning efficiently. Here’s how you can set up and organize your projects with Teams:
-
Define Goals and Objectives: Begin by creating a dedicated channel within your project team for goal setting. Clearly define the project’s overall goals and break them down into specific, measurable objectives. This ensures that all team members understand the project’s purpose and their roles.
-
Utilize Tabs for Documentation: Add a tab for a shared document, such as a OneNote notebook or a Word document stored in SharePoint, where you can outline the goals and objectives. This document serves as a reference point for all team members and can be updated as the project progresses.
-
Encourage Collaborative Input: Foster team collaboration by using the channel to discuss and refine the goals and objectives. Use threaded conversations to maintain organized discussions. Incorporate feedback and ensure alignment among all stakeholders.
-
Assign Tasks and Track Progress: Integrate Microsoft Planner within the channel to assign tasks related to each objective. Clearly link tasks to specific goals to maintain focus. Use Planner’s features to set deadlines, assign responsibilities, and track progress.
-
Regular Updates and Reviews: Schedule regular meetings within Teams to review progress towards goals. Use these sessions to address any challenges, realign objectives if necessary, and celebrate milestones.
Chat in Microsoft Teams
What Does Teams Chat offer?
Chat is the lynchpin of collaboration within Teams. The chat is persistent, that is, messages are always available.
Think of chat as an informal communication tool for the team with email serving as a formal channel for stakeholders, vendors, and so on. For the Marketing team at BrightWork, chat has almost replaced emails within the team.
There are three main types of chat within Teams: small groups and one-to-one, a post in a channel, and a conversation about a file. Each type of chat has particular capabilities and use cases.

3 Types of Chats in Teams
There are three main types of chat within Teams:
-
Small Groups and One-To-One Chats
-
Channel Posts
-
Conversations
1. Small Groups and One-To-One Chats
Chat is located on the left-hand menu of the Teams application. Use chat to discuss any aspect of your project, daily tasks, ask a question, or to check-in with an individual.
To start a chat with a group or individual:
-
Click the New Chat icon.
-
Assign a name to the group, an easy way to track multiple conversations about projects and tasks.
-
Add the relevant team members by entering a name, email address, or group tag. We’ll cover tags later on.
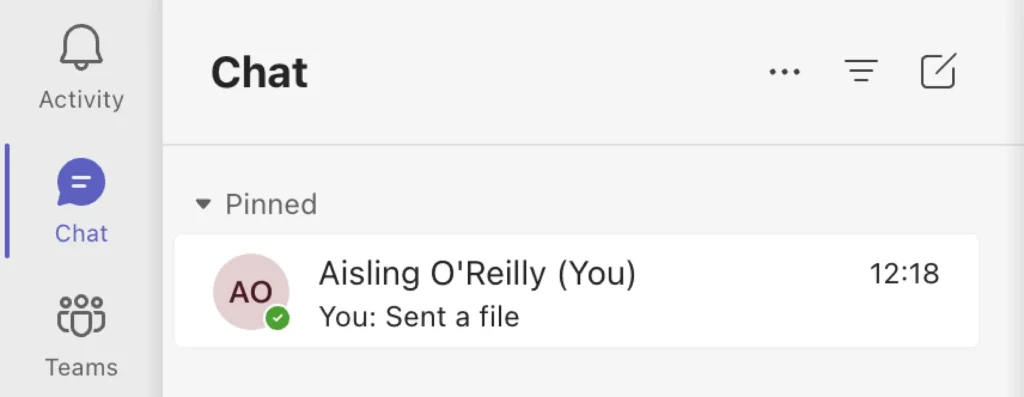
Chats are grouped as Pinned or Recent in your chat pane. A chat is similar to a channel. You can:
-
Add documents to the file tab. Note – this action adds the file to OneDrive for Business rather than SharePoint.
-
Add tabs for files, website links, apps, and so on.
-
Start a video or audio call with the participants.
-
Add or remove people.
-
Leave the chat. A chat doesn’t need an owner so you can leave chats you no longer need to be in.
-
Pin a chat to the top of your chats for quick access.
-
Mute a chat. You’ll still be part of the group; you just won’t receive any notifications.
-
Temporarily pause incoming notifications by setting your status to ‘Do Not Disturb’.
Group and one-to-one chats are not threaded, that is, you cannot reply directly to a specific message. For this reason, it’s a good idea to create smaller groups to discuss details about the project with relevant individuals.
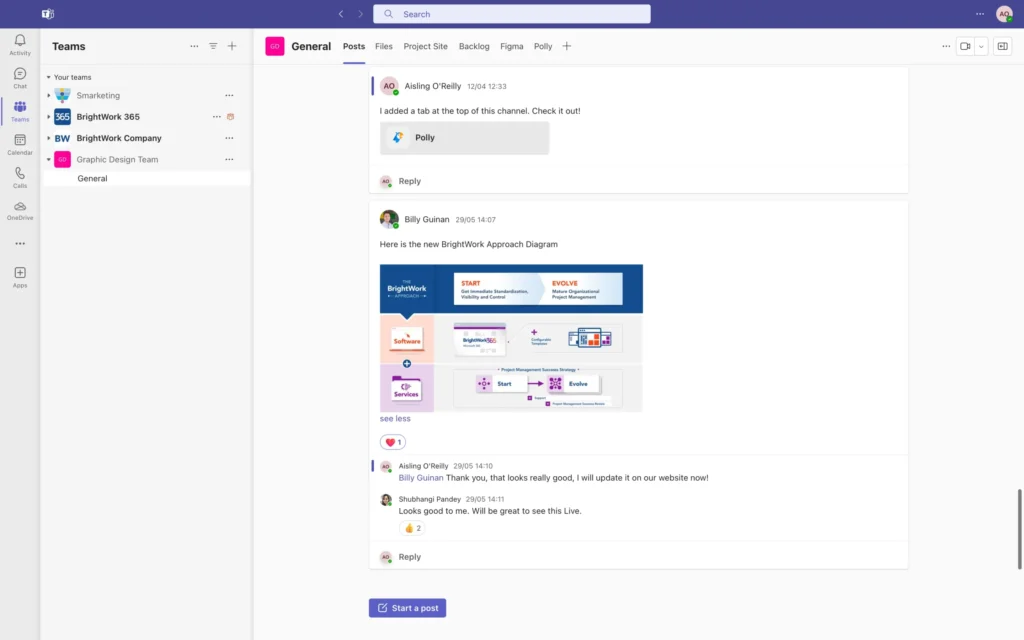
2. Channel Posts
A post is a chat within a channel. Unlike a group or one-to-one chat, the message is accessible to all members of the channel.
There are two main types of posts: new conversation and announcement. Both formats have the same functionality. However, with the option to add a large heading, background color, and an image, announcements are more prominent in the channel feed.
Posts are threaded. Replies to a conversation are grouped together and individuals can reply to any message at any time. However, maintaining a thread only works if participants use the reply button when posting a message.
Channels can get busy quickly. To draw attention to your post, use @mention to tag the channel or team members.
3. Conversations
Projects and documents go hand-in-hand. To collaborate in real-time on a file, use conversations. Navigate to the required project document and open in Teams. Select ‘Conversation’ and start chatting. The conversation also appears as a post in the relevant channel.
6 Ways to Improve Chat in Teams
There are 6 main ways to improve chat in Teams
-
Formatting
-
Delivery Options
-
Post in Multiple Channels
-
Group Tags
-
Manage Chats and Post Notifications
-
Search
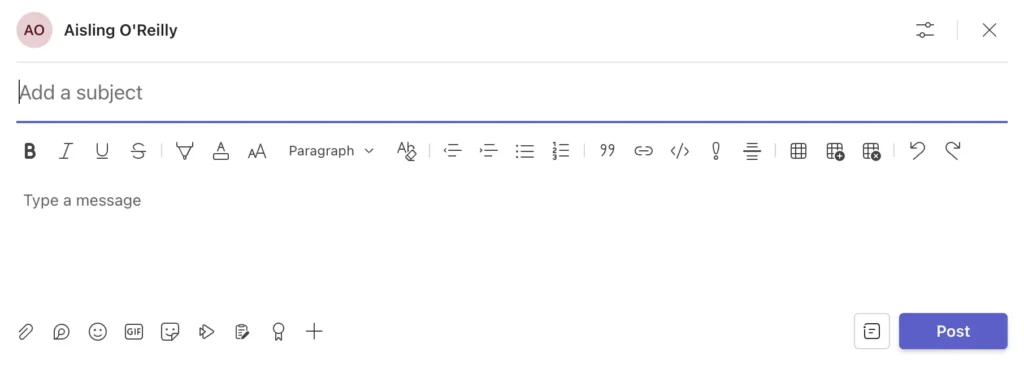
1. Formatting
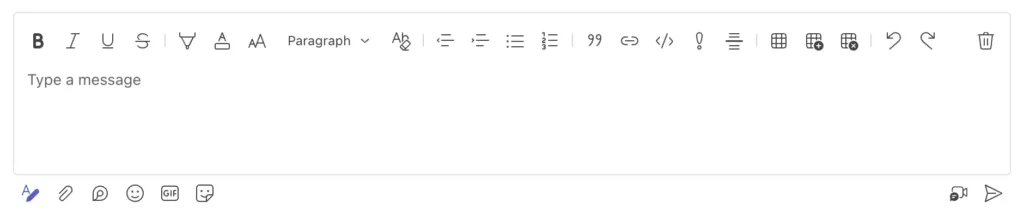
Make any chat, post, or conversation engaging and easier to read with formatting. Click the ‘A’ icon, beneath the message, to access a range of formatting options:
-
Bold, italicize, underline, or strikethrough text.
-
Add highlighting or change the color of the font.
-
Format heading sizes, useful for long messages.
-
Create bullet or number lists.
-
Add quotes, tables, and links.
Attach a file using the paperclip icon. Don’t forget to add a gif or emoji if you can! Spotted a typo or forgot to include a point in your message? Click the three dots in the top right-hand corner of your message and select ‘Edit’ to amend your content.
2. Delivery Options
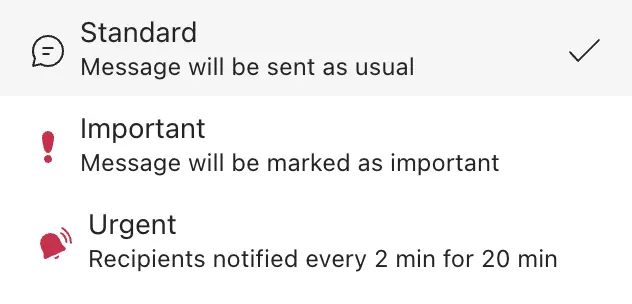
When sending a chat to an individual or small group, you can avail of three delivery options by clicking the ‘!’ icon underneath the message. The options are:
-
Standard: The message will be sent as usual.
-
Important: The message will contain ‘Important’ as the headline, along with an exclamation icon.
-
Urgent: In addition to adding ‘Urgent’ as the headline, the recipient will be notified every 2 minutes for 20 minutes.
Delivery options for posts in a channel are limited to ‘Important’ with the same formatting as per chats.
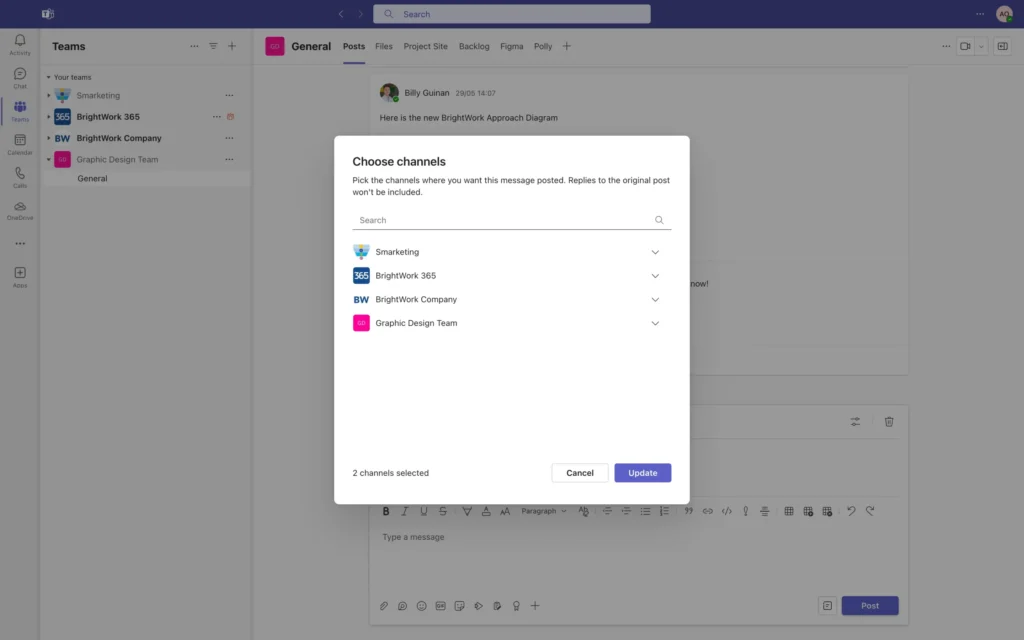
3. Post in Multiple Channels
Need to share important news with several project teams? You can save time by posting the same message in multiple channels instead of just one. Simply select ‘post in multiple channels’, pick your channels, and post your message.
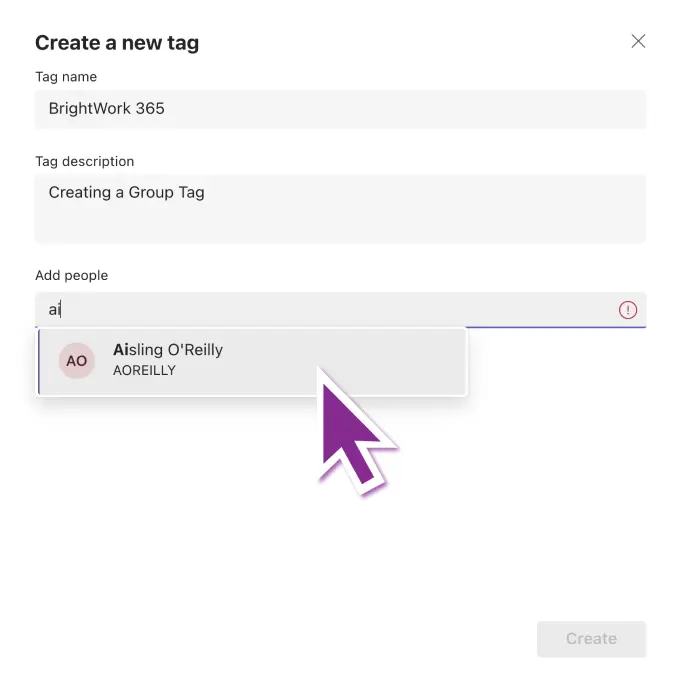
4. Group Tags
A recently introduced feature allows team owners to create custom tags within a team. Imagine you need to collaborate frequently with a small group of testers on a website project. Create a custom tag for this group in the settings of the channel. Once a tag is added, just @mention it in a channel. Everyone who has been assigned to that tag will receive a notification just as they would if they were @mentioned individually.
5. Manage Chat and Post Notifications
Just like a channel, you can pin, hide, or mute a chat. If you don’t have time to reply to a message immediately, mark the item as unread. Posts are slightly different. You can mark the message as unread, turn off notifications, or save a message. Saved messages are stored in your profile.
6. Search
There are a few ways to search through chats for important content. Firstly, search for the relevant team member into the search bar to view one-to-one messages. Next, search within the chat using ‘CTRL+F’. Note – this option also applies within Channels.
Finally, use the filter options in the Chat pane to search by:
-
Keywords used in the message.
-
Unread messages.
-
Meeting chats.
-
Muted chats and posts.

Video Meetings in Microsoft Teams
Video meetings are a powerful way to collaborate with project teams, stakeholders, and vendors. There are a few ways to create video meetings in Microsoft Teams:
-
Schedule meetings for up to 300 people.
-
View 49 meeting participants in a gallery view, with breakout rooms for smaller groups and discussions.
-
Create a recurring meeting series.
-
Use ‘meet now’ to quickly start a meeting.
-
Meet one-to-one with individual team members.
Teams meetings use audio and video with options to switch your camera and microphone off as needed. Microsoft continuously announces new Teams features to enhance collaboration during video meetings, including live reactions, camera filters, live captions, transcriptions, and meeting recaps.

Scheduling a Meeting in Teams
Below we will discuss 3 key areas when scheduling a meeting in Teams:
-
Calendar Meeting Options
-
Inviting Someone Outside Your Organization
-
Video Meeting Options
1. Calendar Meeting Options
Navigate to ‘Calendar’ in the left-hand menu of the app. There are two meeting options in the right-hand corner: Meet now and New Meeting. You can also start a call using the video icon in a chat, in a channel, or within the ‘Call’ tab on the left-hand menu.
There are three ways to start or join a meeting:
-
If using Outlook, click the link in the meeting request.
-
If using Teams, open your calendar and find the relevant meeting. The ‘join’ button will appear on the meeting block about five minutes before the start time.
-
A notification will also flash on your screen when another attendee starts the meeting. Click ‘join’ to attend the meeting.
When joining a meeting, you can opt to:
-
Switch your camera on or off.
-
Blur your background.
-
Turn your microphone on or off.
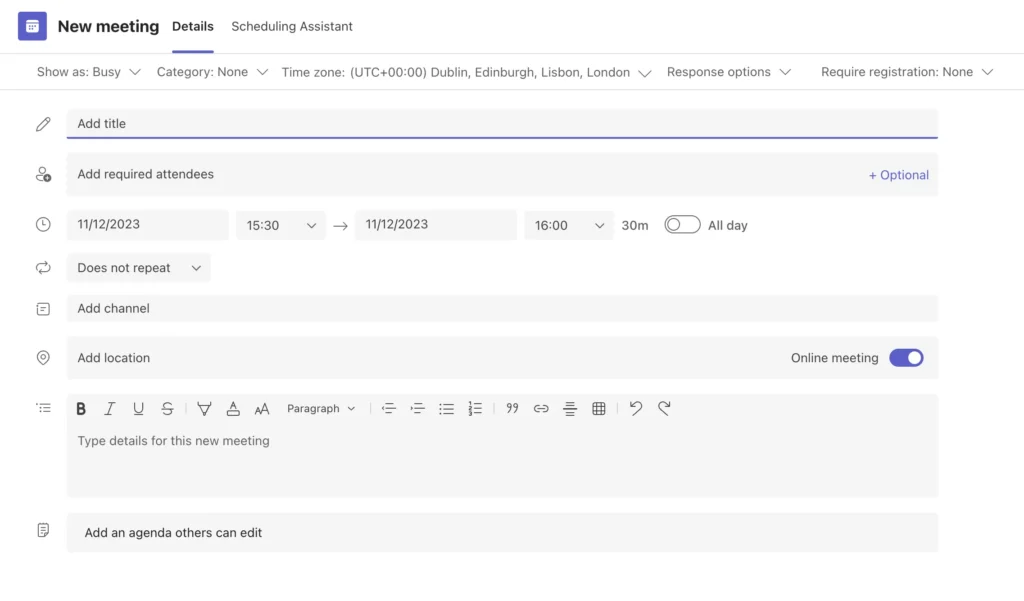
To schedule a new meeting, select ‘New Meeting’ in your calendar. Next, complete the meeting invitation, which is similar to Outlook. You can also create a recurring series using the invitation. Use ‘Scheduling Assistant’ to check the availability of team members and save the meeting to send an invitation to the attendees. That’s it! Your meeting is scheduled and will appear in your calendar in both Teams and Outlook. Teams now includes an option to share a link to a meeting without starting the meeting. Simply click ‘Meet Now’.
To add more context, such as an agenda, to your meeting, click on the session in your Teams calendar. Each meeting has options for chat, files, meetings notes, and a whiteboard. This information is accessible before, during, and after a meeting.
The ‘Multi-Window meetings’ feature launches the meeting in a separate window, making it easier to find files or chats in Teams during the call.
2. Inviting Someone Outside Your Organization
Need to invite someone who is outside of your organization? You can schedule a meeting with anyone who has a valid email address.
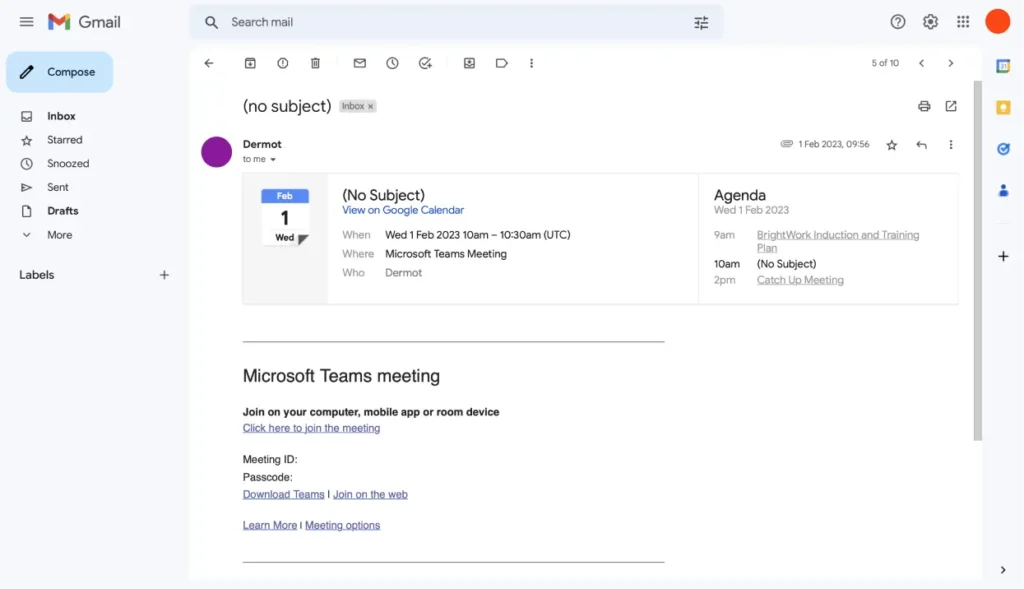
The individual will receive a link via email and can attend the meeting using the web app. To maintain privacy, you can decide if external guests need to wait in a virtual lobby before the meeting starts.
If you have installed the Teams desktop client, you can also schedule a meeting in Outlook using the Teams add-on.
3. Video Meeting Options
An in-call menu is located at the top of the meeting window, with various ways to manage your video calls.
-
Name of the meeting.
-
Duration of the meeting.
-
Meeting participants.
-
Meeting chat, which opens to the right-hand side.
-
‘Raise your hand’ to ask a question. A yellow box is added around the relevant person’s tile on the call, letting others know they wish to speak.
-
Breakout rooms.
-
Toggle your camera on or off.
-
Turn your microphone on or off.
-
Share your screen. You can share your desktop, the contents of an app, or a document by selecting the relevant screen in the panel below the menu. Users can also request control to share content as needed.
-
Leave the meeting. If you have scheduled the meeting, you can choose to end the meeting for all attendees.
-
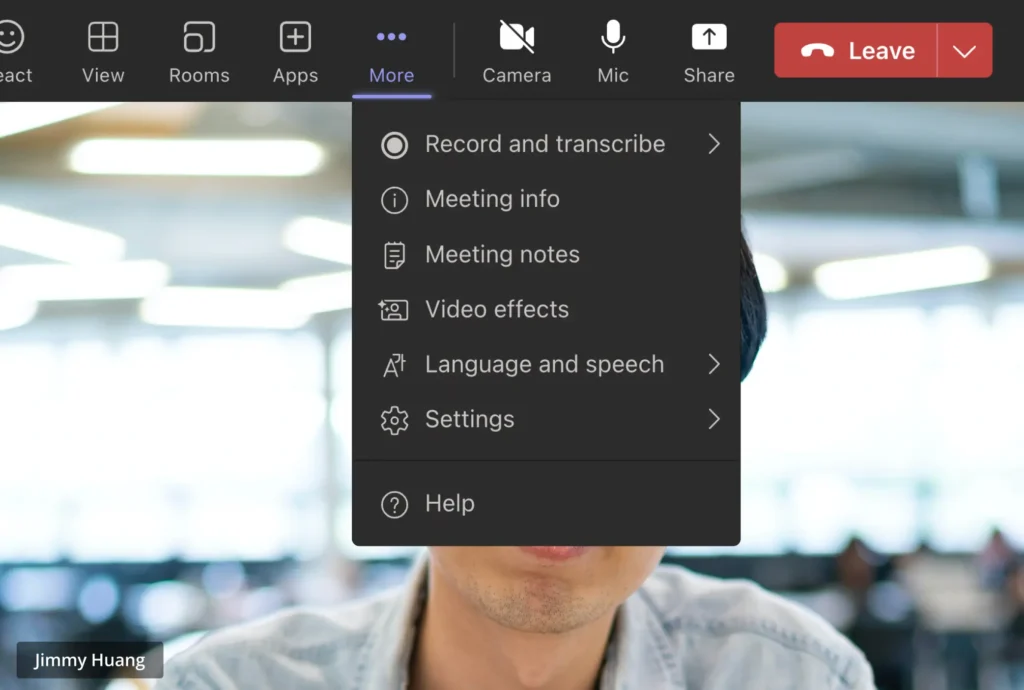
Access ‘more actions’ such as recording the meeting, background settings, and ‘Together Mode’.
4 Must Know Features in Teams
Below we will discuss 4 Must Know features to make your meeting easier to manage!
-
Meeting Recordings and Recap
-
Together Mode
-
Breakout Rooms
-
PowerPoint Live
1. Meeting Recordings and Recap
Meeting Recordings are stored in OneDrive and SharePoint. Anyone can start a recording at any stage during the meeting. Depending on organizational settings, transcriptions may also be available on recordings.
Using the Recap tab from the calendar allows you to access the Whiteboard file shared in the meeting in the content section.
This update makes it easier for anyone who missed the meeting to catch up and removes the need to take notes during the meeting!

2. Together Mode
Together Mode aims to increase collaboration by creating an avatar of each participant and placing these avatars in a shared background, such as an auditorium. This helps individuals to interact with more social cues and makes it easier to see who is talking in the meeting.
3. Breakout Rooms
Breakout rooms are ideal for brainstorms and collaboration within a larger meeting, for example, a training session with your team. Meeting hosts can create up to 50 rooms, choosing to automatically or randomly assign participants to each group. Each breakout room has the same functionality as a regular Teams meeting.
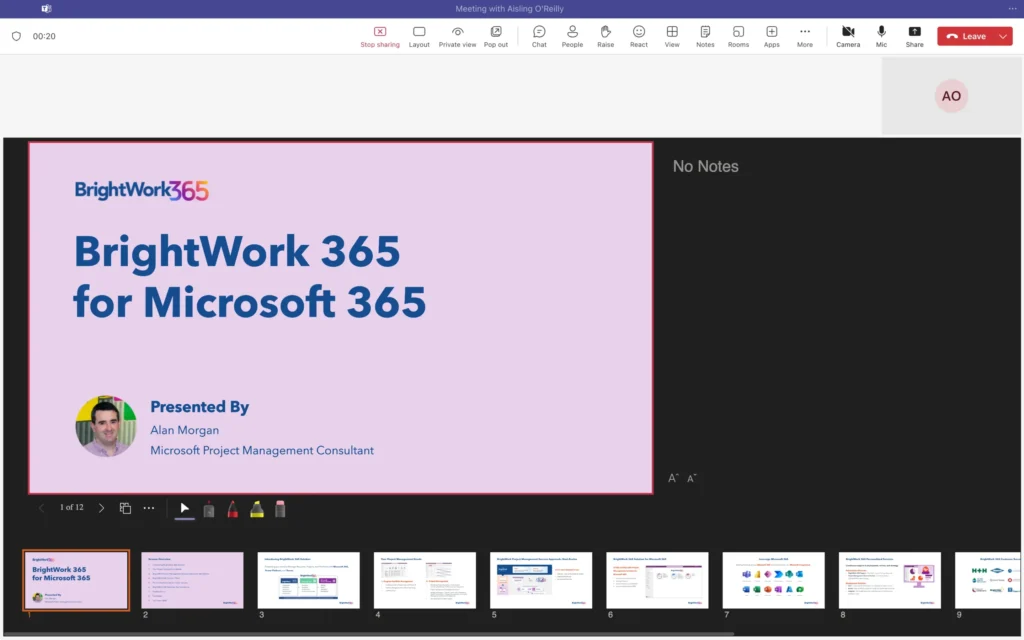
4. PowerPoint Live
PowerPoint Live in Microsoft Teams is a new remote presenting experience. Instead of sharing your screen, you can present your deck from within Teams itself. Select the sharing option and look for PowerPoint Live.
As a presenter, you’ll have access to your notes and chats on a single screen, which also allows you to see your audience. Attendees will only see the active slide and can interact with your content with emoji reactions. PowerPoint Live will make online presentations a little more fun and engaging!
Privacy and Control for Meeting Hosts
Just like an in-person meeting, meeting hosts need to facilitate virtual meetings to create an enjoyable environment for attendees. Virtual sessions also require additional privacy and control settings. When using Microsoft Teams for meetings, you can:
-
Mute all attendees.
-
Invite external users and use a virtual waiting lobby to check who wants to join your meeting.
-
Remove participants during a meeting.
-
Designate presenters and attendees to control who can and cannot share content.
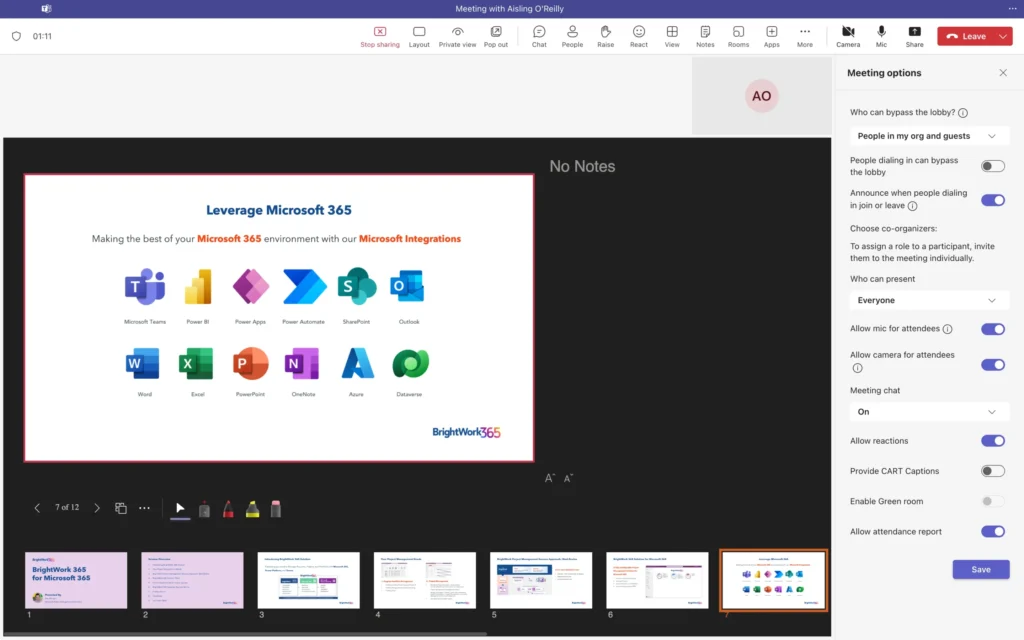
Meeting recordings are available only to those who were invited to or attended the meeting. Likewise, meeting notes are only available to internal users. Now you know how to schedule and run a meeting in Teams, let’s take a closer look at using video meetings for your projects.
Project Meeting Tips for Teams
Before you start scheduling video meetings, consider if you need to update your project communication plan. Make sure your team and stakeholders are aware of:
-
The use of video meetings.
-
Software and hardware requirements, for example, Microsoft Teams and headphones.
-
Where to find training videos and support if needed, for example, free Microsoft resources.
-
The back-up plan in case of technical difficulties, for example, issues connecting to your broadband network.
With a little tweaking, you can replace any face-to-face meeting with a video call in Teams. The key is preparation. This includes:
-
Creating and sharing an agenda in advance using Meeting Notes as explained above.
-
Assigning times to agenda items – and sticking to those times!
-
Sharing required reading, such as presentations or reports, beforehand.
-
Asking members of your team to prepare contributions or updates.
-
Starting and ending meetings on time.
-
Using breakout rooms for discussion and feedback.
-
Circulating action items afterward. The BrightWork Marketing Team adds tasks to our project site during meetings so nothing falls between the cracks
Meeting etiquette is also important. Try these ideas for adapting in-person meetings to virtual video calls.
-
If possible, switch on cameras during the meeting. Just like a face-to-face meeting, the ability to see your team and gauge their reactions is key.
-
That said, video can reduce call quality on occasion. In the place of video, ask team members to say their name before speaking so everyone knows who is talking.
-
Some microphones can pick up background noise. It may be a good idea to place yourself on mute when you are not talking.
-
Make time for ‘small talk’ at the start of the meeting. Give people a chance to catch up and share what’s happening.
-
At the start of a meeting, ask if anyone needs to leave early and if so, allow them to share any updates early on.
-
As the meeting host, ask questions during the session to ensure everyone has a chance to speak up and is paying attention!
-
Stay focused on the meeting – that means no emails or browsing online.
-
Turn off other applications and notifications.
-
Share a summary of actions and follow-ups, with owners and due dates, after the meeting. Not only will this keep your project on track – it increases accountability within the team.
Add these tips to your communication plan, share it with the team, and store the document an easy-to-access place. As you become more familiar with video meetings, ask your team and stakeholders for feedback to improve these sessions.
Tips and Tricks for Microsoft Teams
Managing Notifications
The stream of notifications in Teams can feel a little overwhelming, especially when you need to focus on an important task. There are a few simple ways to reduce interruptions:
-
Update Your Team-wide Notifications
-
Turn off Notifications for a channel or chat
-
Change Your Availability to “Do Not Disturb”
1. Update Your Team-wide Notifications
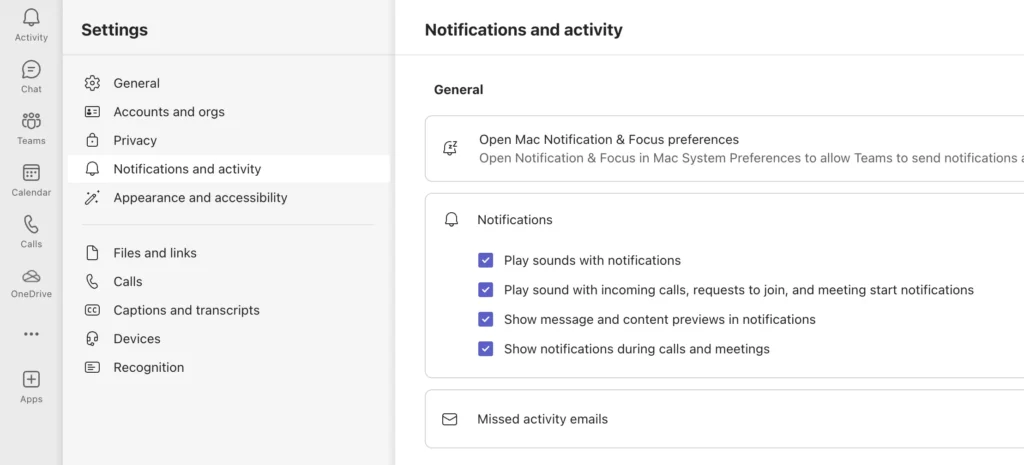
Start by updating your Teams-wide notifications in you settings, accessed by clicking your profile picture. I recommend turning off emails for ‘missed activity’ to reduce email volume – and pressure to check what is happening in Teams!

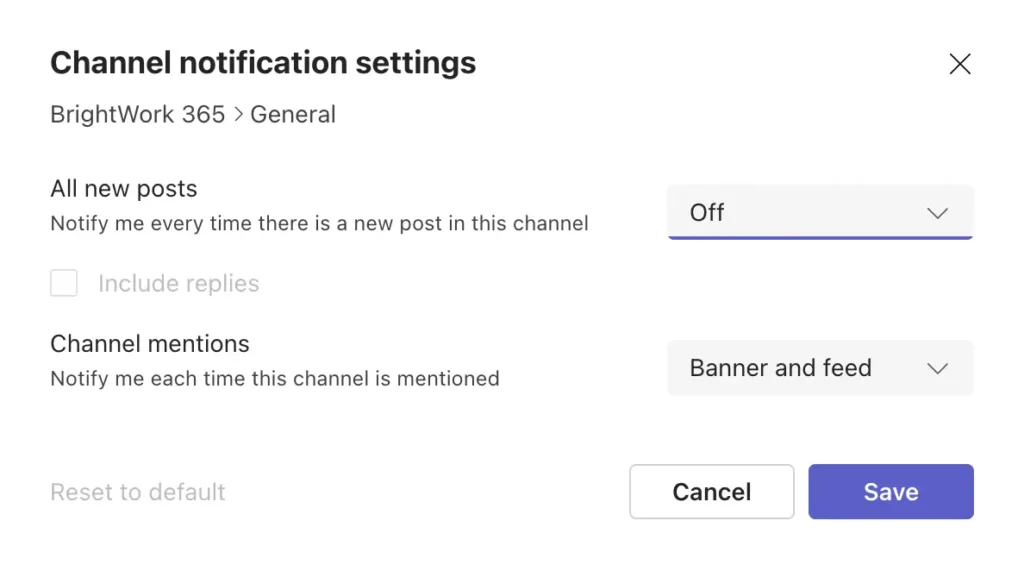
2. Turn off Notifications for a Channel or Chat
As mentioned above, you can also turn notifications off for a particular channel or chat.
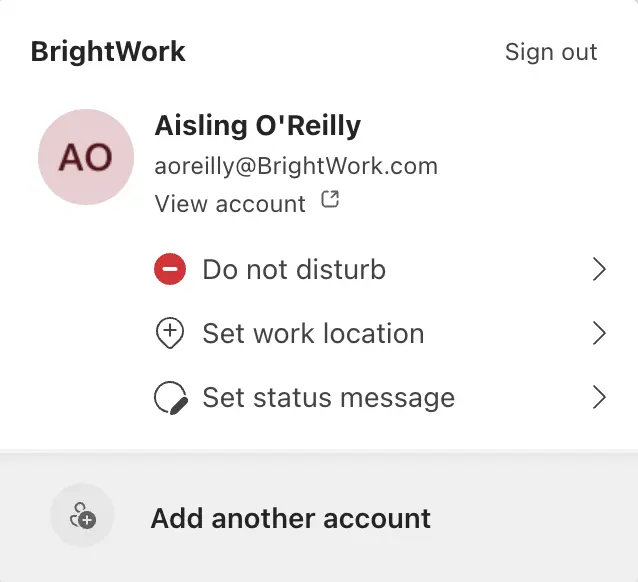
3. Change Your Availability to “Do Not Disturb”
Looking for a quicker way to block incoming calls and notifications? Change your availability to ‘Do Not Disturb’ under your profile picture or by typing /dnd into the search bar. You can grant priority access to your team or stakeholders under Privacy (Settings). This means you’ll still receive notifications from these individuals when your status is set to ‘Do Not Disturb’.
If you want to receive notifications without the pressure to reply instantly, try setting your status to ‘Appear Away’.
Find People and Information Quickly
As user adoption grows, you may suddenly find yourself creating or participating in multiple teams! Try these quick tips to track key conversations and find information. The menu located on the left-hand side of Teams has a feed for activity, teams, and chat.
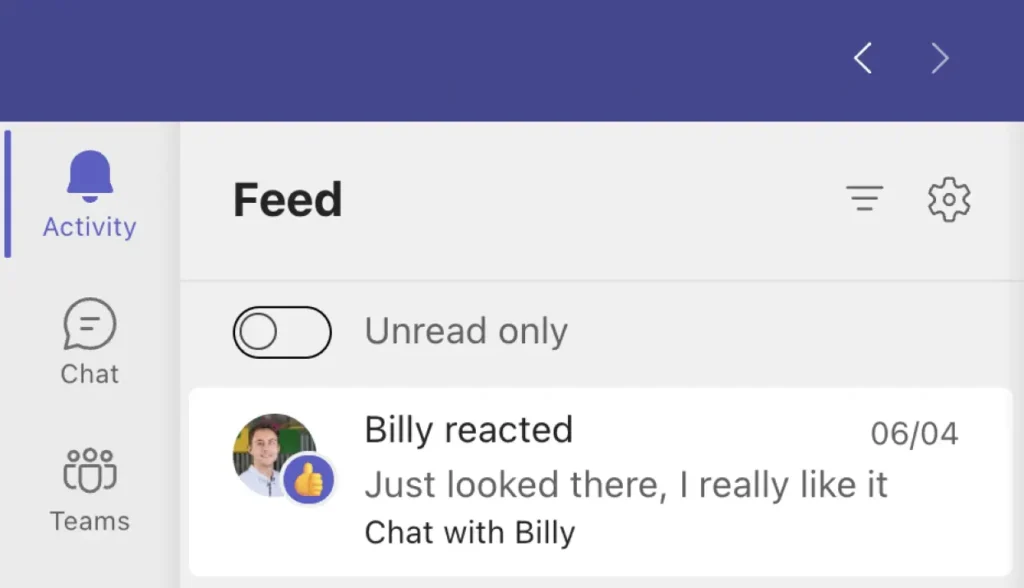
1. Activity
The Activity Feed displays your interactions on Teams and how people interact with you, for example, if someone replies to your chat. Use the filter option to narrow results to:
-
Unread chats or messages.
-
@mentions, i.e. if a team member has tagged you in a chat.
-
Replies.
-
Reactions to your messages.
-
Missed calls.
-
Voicemail.
2. Teams
To focus on important teams, such as a busy project, pin the relevant channel to the top of the list of teams. Click the three-dots beside the channel and select ‘Pin’. You can also hide a team using the same menu. You’ll still be a member of the team but the team will be removed from view.
3. Chats
Likewise, it’s possible to pin or hide a chat. You can also opt to leave a chat using the same menu. There are multiple ways to manage chats such as:
-
Marking an item as unread.
-
Renaming a group chat.
-
Saving a message to your bookmarks.

Document Management
A file library is created in the underlying SharePoint site for a new team, with a folder created for each channel.
Microsoft is working towards bringing the full power and experience of document management in SharePoint into Teams. This means your project team can work seamlessly in either platform with centralized project documentation. As such, the Files Tab in a Team site is increasingly similar to the documents view in SharePoint Online.
With Teams, you can:
-
Upload existing files and folders.
-
Create a new folder or file (Word, Excel, PowerPoint, and OneNote).
-
Sync files to your desktop for quick access.
-
Open and work with files in SharePoint.
-
Move or copy files between folders, channels, or Teams.
-
Copy and share documents links for Teams or SharePoint.
-
Open, edit, and save a file in Teams, in your browser, or on your desktop.
-
Co-edit documents in real-time.
-
Start a conversation about a document.
-
Add comments to a document.
-
Bookmark important files within a library with the ‘Pin to Top’ option.
-
List documents as a tab within a channel so they are easier to find.
-
Add existing SharePoint document libraries to a team.
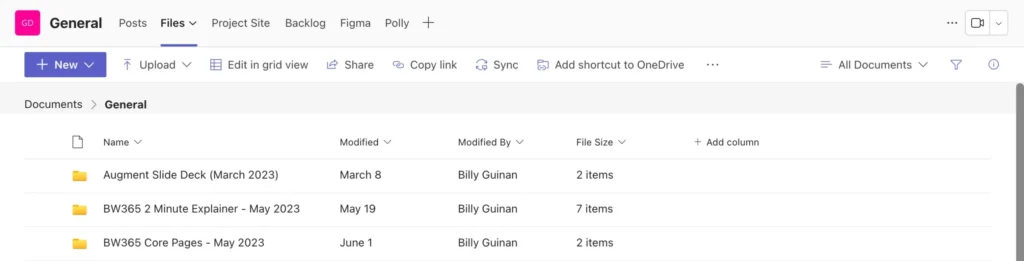
There are a few ways to find files in Teams:
-
Click ‘Files’ in the left-hand navigation for recently accessed files.
-
Filter search results by file. Refine results further by team, file type, and modified by.
Commands
Commands are shortcuts for performing tasks in Microsoft Teams more efficiently. Simply type the below commands into the search bar to find what you need!
-
/Files: Find files shared with you on Teams.
-
/GoTo: Go straight to a channel
-
/Call: Starts a call with someone else on Teams
-
/Help: Access the Teams Bot, T-bot, for help.
-
/Saved: View your saved messages
-
/Join: Join a team.
-
/Mentions: See all your @mentions.
-
/Whatsnew: See what’s new in Teams.
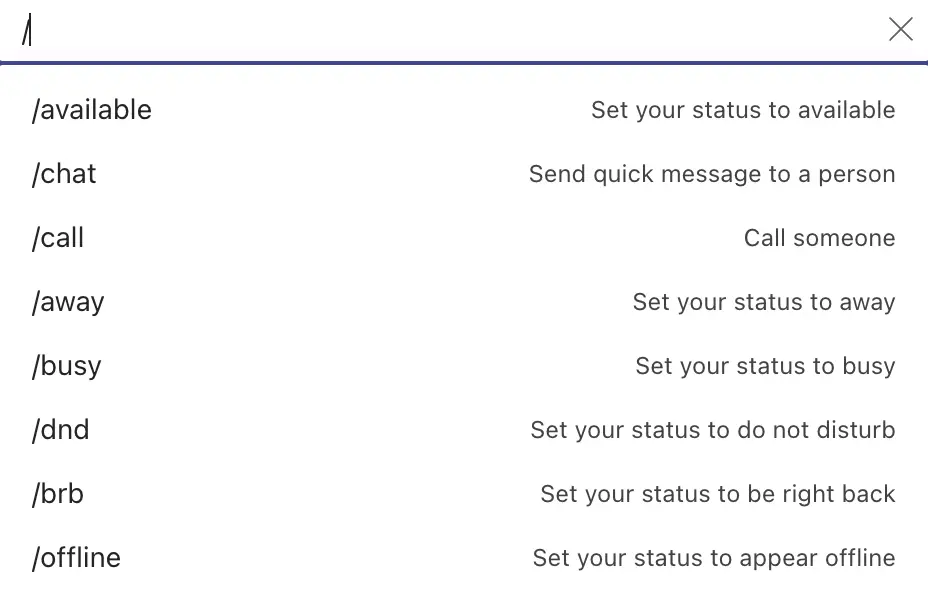
For a full list of commands, type / into the search bar or see this list from Microsoft.
Bots and Apps
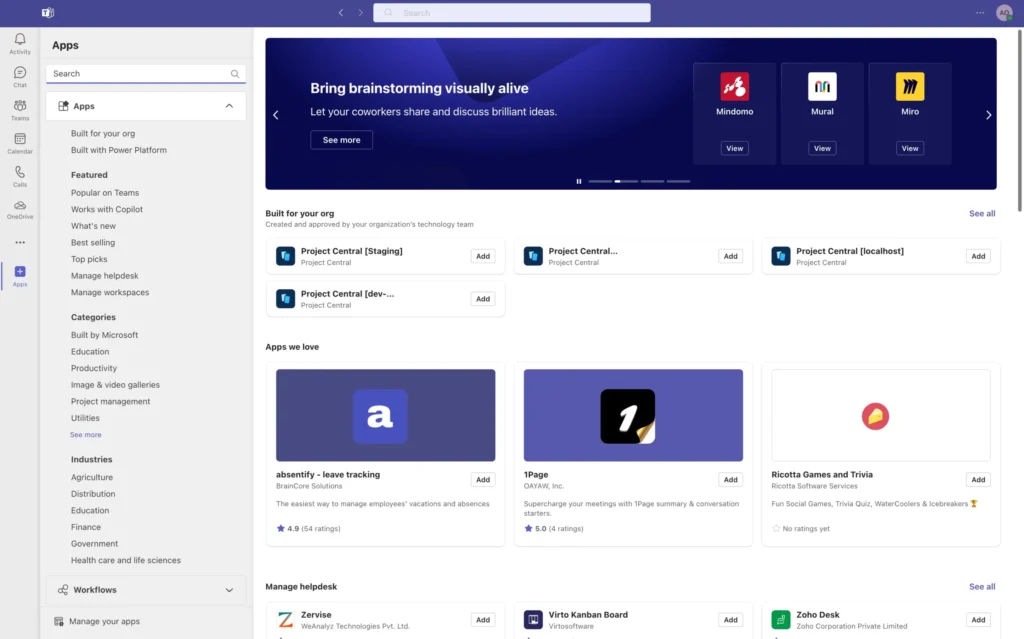
Bots and apps are an easy way to add extra functionality to Teams.
Select ‘Apps’ in the left-hand menu for a full list of options, including solutions from Microsoft and third-party vendors. Before installing an app, check the pricing options. Some apps offer a short free trial or a limited free tier. Bots and apps can be added to a particular team or channel or used just within your own Teams environment. This way, you can customize your experience to match your needs.
Here are a few ideas to help you get started:
-
Who: Search for anyone in your organization based on what they’re working on and who they work with.
-
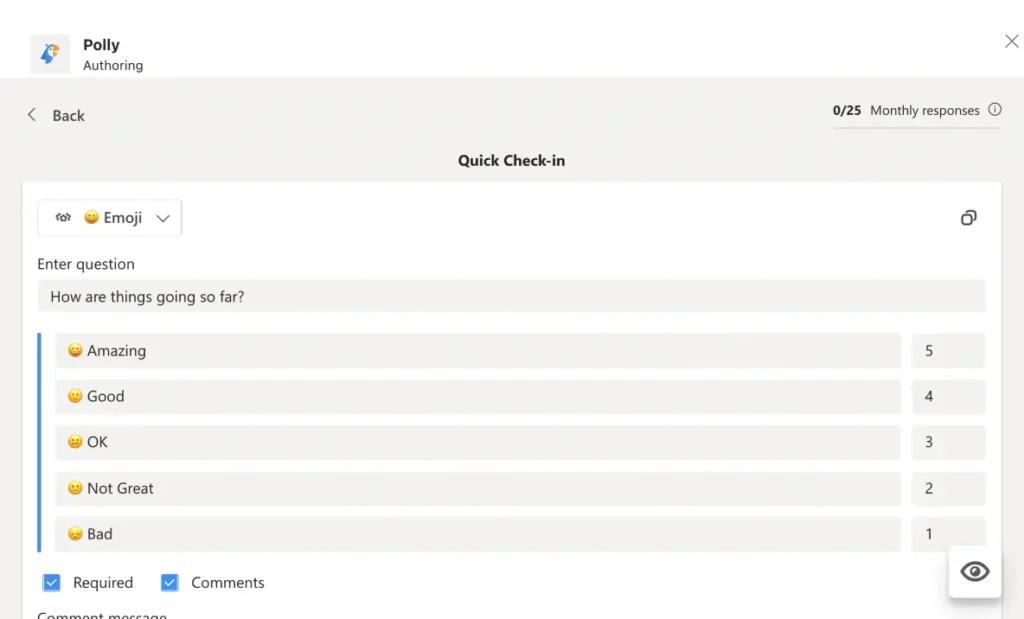
Polly: Useful for creating simple polls.
-
Forms: Another option for surveys, quizzes, and polls.
-
Praise: Share your appreciation with a team member!
-
How-to: A series of training videos for Teams. Add as a tab in a channel to improve user adoption.
-
Remember This: Use to create time-based reminders to reply to a conversation.
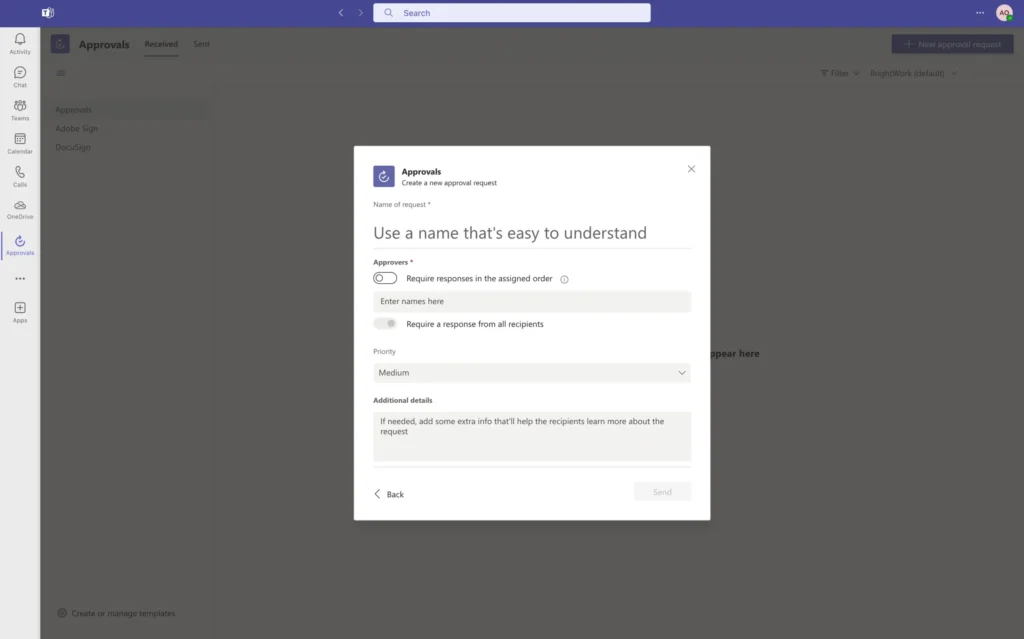
Approvals
Approvals is an easy way to create, manage, and share approvals from a conversation in a chat or channel, or by using the Approvals app. Use the Approvals app to track previous and pending requests, including status, requester, and approver.
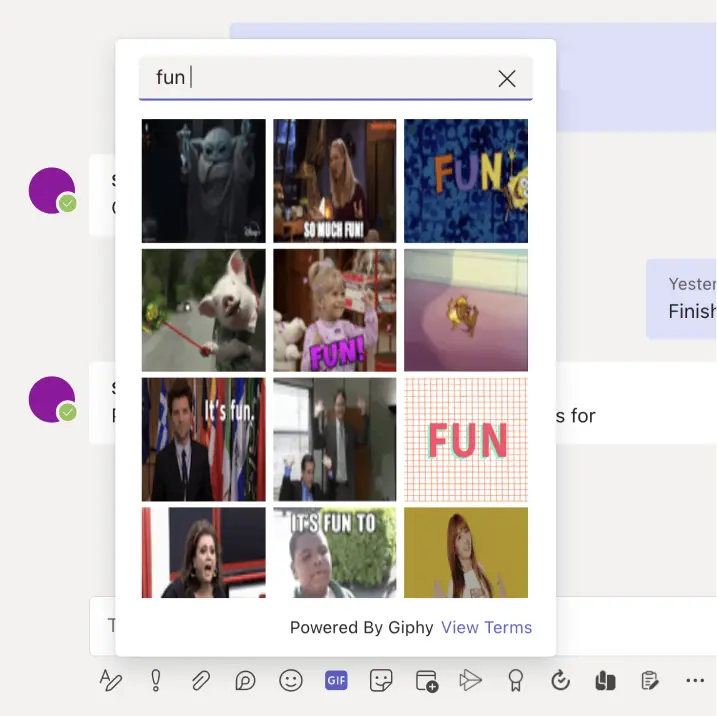
The Fun Stuff
Like any messaging tool, Teams makes it easy to add some light-hearted fun or share your thoughts with emojis, gifs, polls, photos, and so on!
The various options are located on the editing bar underneath a message. Add some personality to individual teams and channels by uploading a team profile picture or adding emojis to channels.
-
To add a team picture, click ‘manage team’ and settings. Select ‘team picture’ and upload the new image.
-
To add an emoji to a channel, find and copy the relevant Unicode. Select ‘Edit this channel’ and paste the code into the title.
Using an app such as Polly or Forms, you can create fun (or serious) polls, surveys, or quizzes about any topic. You can find these apps in the app section in Microsoft Teams and download them to use in your chats and channels.
What’s New in Teams (2024)
If you are a MS Teams user, you would have been on the Classics version. Starting in late August, New Teams will automatically install on Windows with new features and installations. Microsoft Teams (work or school) app name is changing to Microsoft Teams.
Currently, users can install the new Microsoft Teams using the “Try the new Teams” toggle switch in classic Teams or by Admins upgrading directly to the computers in their organization.
| Classic Teams | New Teams |
| The classic Teams client can auto–start itself without a user manually launching it after it’s been installed. | New Teams won’t auto–start until the app has been manually opened once by the user after machine-wide installation by an admin. |
| Contacts in chat | You can now use the new People app to access Contacts instead of your chat. Pin it to your left navigation pane by selecting the (…) menu, right-click People, and then select Pin. |
| Ability to save messages and files in Teams | The Save feature is no longer available. However, classic Teams users can download their saved messages and files to a local folder that they can open in new Teams. Learn more: Mark a message as saved in Microsoft Teams |
| Theme Setting | Like other Office applications, Teams Theme setting follows the OS Theme by default. You can change this default in Teams Settings > Appearance and Accessibility. Note that any change to the default Theme won’t be saved if the user signs out. |
| Settings dialog | Now you can add the third-party storage app directly from the Teams App Store. You no longer see the “Add cloud storage” in the OneDrive app on Teams’ left navigation bar or within the Files tab in Teams channels. |
| Adding third party cloud storage service from Files app and Files tab in channels | Now you can add the third-party storage app directly from the Teams App Store. You no longer see the “Add cloud storage” in the OneDrive app on Teams’ left navigation bar or within the Files tab in Teams channels. |
| Adding a document library (DocLib) app to a tab in channels | Use the SharePoint app instead. Then add the document library from there as a tab to the channel. Existing document libraries automatically convert to a SharePoint document library on first use. |
| Look up LinkedIn while in a 1:1 chat | Select a user’s avatar or profile photo anywhere in Teams and navigate to the LinkedIn tab within the profile card. |
| Edit team name and change team picture from Edit team view. | Team owners can edit team name and change team picture in the team Settings tab by selecting More options (…) > Manage team. |
| Files app on Teams left navigation pane | The OneDrive app replaces the Files app on the left navigation pane. |
| Ability to use tags in the “Add member” dialog. | There’s now an advanced flow for tags. |
| About links in the More options menu (…) Help in the app bar | About links are now in the Settings app under the About Teams category. The Help entrypoint, including Help links and Give Feedback is now located under the More options menu (…) in the title bar. |
| Whiteboard Tab automatically displayed in meeting tabs. | Using Recap tab from the calendar allows you to access the Whiteboard file shared in the meeting in the content section. |
| Presenter mode (standout) during PowerPoint Live sharing. | Presenter mode is no longer available. To use presenter modes, start a screen sharing session and choose one of the three available modes |