

The rise of collaboration and collaborative tools in the workplace is, for the most part, a positive trend. Working across teams, with remote colleagues, and with third-party vendors opens up new opportunities for innovation and growth.
BrightWork 365, built on Microsoft 365, empowers organizations to overcome these barriers with structured workflows, automation, and real-time reporting. Let’s explore seven of the most common project management challenges and how BrightWork 365 helps you solve them.
However, there are some risks associated with collaboration, or more precisely, with sharing content and data.
Shadow IT, ”the use of information technology systems, devices, software, applications, and services outside the scope and supervision of an organization’s approved IT system” is on the rise.
Shadow IT includes the use of personal data storage or cloud systems, unapproved apps, content sharing with external parties, and unprotected devices.
These problems arise when team members can’t easily share project information with each other, either due to overly-strict security or the absence of an approved sharing tool.
In such cases, individuals find their own workarounds, making it impossible to track when, how, and where data is shared. A recent study shows 72% of IT executives don’t know how many shadow IT applications are being used in their organization.
In this article, we’ll take a look at a practical solution for secure collaboration with SharePoint – permissions. We’ll cover the basics of SharePoint permissions and best-practices for internal collaboration.*
Before we start
This article is a high-level review of SharePoint permissions for internal collaboration. The details may or may not apply to your local SharePoint and governance strategy.
If you have any concerns about your SharePoint project site or want to make changes to permissions, please consult your SharePoint administrator beforehand.
For more details on permissions, including assigning and managing permissions, please see the Microsoft website.
SharePoint Permissions
In SharePoint, permissions are used to control access to a site and content. This includes the ability to create a site, and upload, edit, or delete a file.
Below is brief summary of default permissions for SharePoint On-Premises 2019/2016/2013. In general, these default permissions will cover most scenarios within your organization and for projects.
-
Full Control: This user has all permissions. Note – this level cannot be edited or customized.
-
Design: Refers to the ability to create lists and document libraries, edit pages, and apply themes. This permission needs to be manually assigned to relevant users.
-
Edit: Includes the ability to add, edit, and delete lists; view, add, update, and delete list items and documents. By default, this permission level is assigned to the Members group.
-
Contribute: Similar to edit permissions with the ability to view, add, update, and delete list items and documents.
-
Read: These readers can view pages or items in lists and libraries.
-
Limited Access: This allows a user to visit a site page or library but removes the ability to open or edit content. Limited Access is assigned to individual items, not users. This permissions level cannot be edited or customized.
-
Approve: Users who can edit and approve pages, list items, and documents.
-
Manage hierarchy: Allows users to create sites and edit pages, list items, and documents.
-
Restricted Read: Can view pages or documents, but cannot access historical versions.
-
View Only: Can view pages, items, and documents. These users can only download files that cannot be opened in a browser.
Permissions start at the site collection level and are inherited by underlying sites. Changing permissions within a site and for individual libraries or lists breaks this inheritance.
Where possible, stick to the default inherited permissions and avoid changing permissions at a very granular level. Otherwise, finding problems quickly becomes challenging!
Permissions are managed with SharePoint groups, a set of users who all have the same permission levels.
Grouping users together by permission simplifies security as you only need to check one place to manage, change, or revoke permissions. Otherwise, you have to manage permissions on a case-by-case basis.
SharePoint sites contain pre-defined groups and often include the Owners, Members, and Visitors groups.
-
Owners typically have Full Control permissions for the site.
-
Members are users who can add, edit, and delete content.
-
Visitors have read-only access to a site.
On a project, this may look like:
-
Project manager: Owner.
-
The team and key stakeholders: Members.
-
Other internal departments and stakeholders: Visitor.
More groups may be available depending on the type of SharePoint site in use and how the site is configured by your SharePoint administrator. Depending on your organizational requirements or SharePoint governance plan, custom groups may also exist.
Use the principle of ‘least privilege’, or the minimum amount of access needed to work on the project, to assign users to the various groups.
If a stakeholder needs to periodically read a document, they shouldn’t have full control permissions. Likewise, it’s impractical to add team members to the Visitors group with minimum permissions.
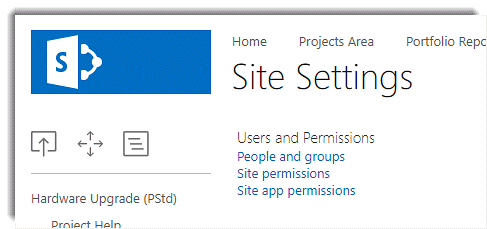
You can add or remove users from SharePoint Groups in Site Settings (People and groups, and Site Permissions).
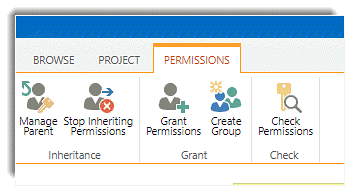
In this area, you can also:
-
Manage the parent site
-
Stop inheriting permissions
-
Grant permissions
-
Create custom SharePoint groups
-
Check permissions.
The application of permissions to your projects really depends on how both SharePoint and projects are managed within your company. Again, refer to your IT team for guidance.
It’s also a good idea to discuss SharePoint security with the project management office, who are typically responsible for creating templates and best-practices.
The main goal is to ensure project data is secure and that team members can collaborate safely without creating too much administration or blockers.
SharePoint Collaboration Tips
Using permissions for a SharePoint project site makes little difference if your team is not following guidelines for sharing and storing content!
Keep reading for some best-practices tips for secure internal collaboration.
1. Start Strong
Our first tip sets the scene for using SharePoint for collaboration at an organizational level. It’s vital to have a SharePoint owner and governance strategy in place before deploying SharePoint or increasing the usage of an existing installation.
Changing bad habits is hard, so start with a clear plan for permissions, content sharing, and security.
Document and update these plans as needed. It’s also a good idea to incorporate training on local SharePoint best-practices into new employee onboarding.
2. Provide End-User Training
In addition to training and organizational guidelines, below are some important tips to share with your team during project kickoff.
-
Store all project documents in the correct libraries to protect content with the right permissions.
-
Use hyperlinks to share content via email. Avoid using attachments.
-
Don’t save project documents to personal storage systems like Google Drive or Dropbox to access outside of work. If there is a problem with accessing content off-site, speak to your IT team.
-
Ask the team not to sync sensitive documents to their desktop or laptop. This reduces the possibility of sensitive data falling into the wrong hands if the laptop is stolen! If needed, you can remove the sync option for certain files.
-
Use OneDrive to store personal documents.
3. Track Your Files
There are two simple ways to track and manage changes to your files in SharePoint: alerts and versioning. These features will give you extra control – and some peace of mind!
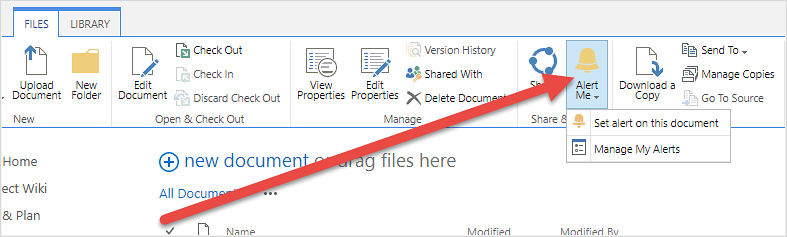
Alerts
Alerts are located in the ribbon in the document library.
-
Add an alert to a library to receive a notification when a new item is uploaded.
-
Add an alert to individual files to track updates. For example, you may like to receive an email when any change is made to a finalized document.
Version Control
Version control allows authors to revert to a previous version of a document if needed. This setting is a useful way to control edits and retrieve lost data.
Activate version control in the library settings.
* If you are wondering about security in permissions in BrightWork, please see this reference table. BrightWork uses existing SharePoint security capabilities, with some additional functionality for specific BrightWork templates.