Design Sync and Configuration Refresh
This guide will focus on BrightWork Design Sync. The guide will also serve as a refresher for some of the previous exercises you have done.
1. Introduction
This guide will focus on BrightWork Design Sync. The guide will also serve as a refresher for some of the previous exercises you have done.
Prerequisites
You will need to have completed the following guides:
-
Create a BrightWork Training Office in the Introductory Guide
-
Working with Lists and Libraries
-
Project Metrics List Training Guide
-
Configure BrightWork Reporter Guide
-
Working with Report Data Sources
If it has been a while since you completed these guides, you should review them again so you can remember the changes you made to your training environment that you will be building on this in this guide.
Suggested Exercises
At the end of many chapters you will see some Suggested Exercises that you should be able to complete on your own, based on what you have just done.
These suggested exercises will not contain any steps – you will need to apply what you have learned to do the exercise.
We strongly recommend you complete these suggested exercises, as they will help to reinforce what you have just learned.
About User Names
This guide uses fictional user names that exist in our TrainingZone, for example you may see an instruction like ‘Select Dan Bacon from the Assigned To menu’.
If you are taking the training in your own environment, then these names will not likely exist and you should use other names.
Set-Up for SharePoint Designer
Certain sections in this guide require you to use SharePoint Designer 2013. Follow the below steps to use SharePoint Designer 2013 in this exercise.
Download and Install SharePoint Designer 2013
If you do not already have SharePoint Designer 2013 installed on your computer, you can download it and install it for free here.
2. Create New Project Standard Training Template
In this section, you will create a new Project Standard Training template.
Create New Project Standard Training Template
To use this guide, you must create a new Project Standard Training template.
Recall the Create a Training Project Office Guide in which you created templates and sites. Navigate to the Templates Area and see if you can remember how to create a new template called “ {your initials} – Project Standard New” using the Training – Project Standard template that you used to create a template in that guide.
If you can’t recall how to do this, the steps are below.
To create this template:
-
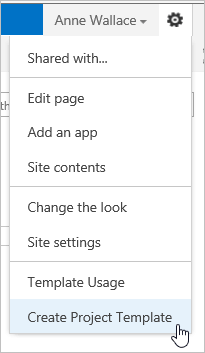
Navigate to the Template Area.
-
Click Settings | Create Project Template.
-
Give the template a title, e.g. {your initials} – Project Standard New.
-
Choose Select a template and click Browse.
-
Type ‘Training’ and click Enter on your keyboard.
-
Select Training – Project Standard and click OK.
-
Click Create.
3. About Design Sync
In this section, you will learn about BrightWork Design Sync.
What Does Design Sync Do?
Imagine a scenario where your organization has been using BrightWork for a while. You have a couple of main templates that are used in a large number of projects. You and the other project managers sit down and agree a list of improvements to the templates. This will be fine for all new projects going forward, but what about all the current projects that were created using the old, unimproved template?
With BrightWork Design Sync, you can make design changes to a template and pull some or all of the changes into the sites created from this template. This saves you a lot of time and ensures that the changes are implemented correctly. These changes can include adding new items such as lists and list columns and removing certain unmatched items in the destination site.
Previous Uses of Design Sync
If you have followed these guides in sequence, you will have used BrightWork Design Sync at several points in your training to push template changes to project sites; see below for a synopsis of what you did in previous guides.
Working with Lists and Libraries
Project Lite Template
-
Added the Region Site Column to the Project Statement
-
Modified the All Tasks view in the Tasks List
-
Added the BrightWork Project Goals list
-
Renamed the Project Goals list
-
Enabled Versioning in the Issues list
-
Configured the BrightWork list settings to enable Referencing
-
Enabled Check Out and Versioning on the Documents library
Project Standard Template
-
Added the Region Site Column to the Project Statement
-
Hid columns in the Goals list
-
Added a Calculated column to the Tasks list
-
Added a Choice Indicator column to the Tasks list
-
Added a Completed Items view to the Tasks list
Project Structured Template
-
Added the Region Site Column to the Project Statement
Configuring BrightWork Reporter
In this guide you used Design Sync to replace the Home Page design of the Project Standard project you had created with the new one you altered on the Project Standard template. You also used Design Sync to replace a reporter page by deleting the page in the project and Syncing allowing the template page to replace the deleted older page in the project.
-
Applied Home Page Design
-
Replaced BrightWork Web Part Page
Note: We recommend that you review the guides detailed in the Prerequisites section to refresh yourself on the changes you made to your projects and to your previous usage of Design Sync. While not essential, it will greatly help your understanding of the following exercises.
Design Sync Elements
Some items are automatically synced and some are optional to sync. Due to certain SharePoint design restrictions, and other practical reasons, not all changes to the template are synced. Below is a brief list containing some of the items that can and cannot be synced with BrightWork.
What Can be Synced
These are a selection of the items that BrightWork Design Sync can synchronize between template and project:
-
Site features
-
Site columns
-
List and Library settings
-
Site Logo and URL
-
Tree view settings
-
SharePoint 2010 List Workflows
What Cannot be Synced
These are some of the items that BrightWork Design Sync cannot synchronize.
-
Content in standard libraries
-
Personal Report and Views
-
Created Site Asset Libraries
For a complete list of the synchronized elements, please see the About Design Sync BrightWork help topic.
4. Update Template Binding
In this section, you will learn how to remove template bindings from projects and bind this project to a newly created template.
Remove Template Binding from Project
In this section you will use SharePoint Designer to remove the template binding from the site you created using the Training Project Standard Template (you did this in the Create a Training Project Office guide).
-
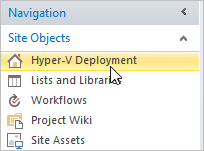
Navigate to the site you created using the Project Standard template. It should be called Hyper-V Deployment.
-
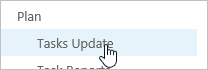
Click a list in the Quick Launch, e.g. Tasks Update.
-
Click List | Edit List.

-
Click Allow and Yes, then enter your username and password if prompted.
-
Click the project name in the Site Objects bar.
-
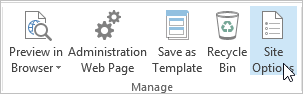
Click Site Options.
-
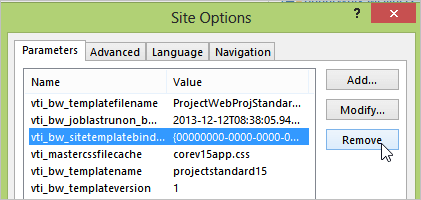
Select vti_bw_sitetemplatebinding and click Remove.
-
Click OK.
Bind Project to New Template
Now you will bind the site to the template you just created.
-
Navigate back to the training site you created using the Project Standard template. It should be called Hyper-V Deployment.
-
Click Settings | Site Settings.
-
Click Configure Template Binding.

-
Click Browse.
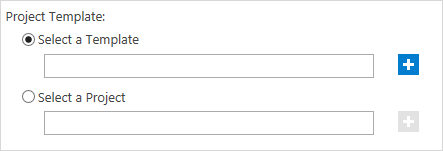
Note: If you are unable to browse for a template, make sure you have correctly unbound the template in the previous exercise.
-
Click Enter on your keyboard to show a list of compatible templates.
-
Select the new template you created in Section 2 Create New Project Standard Training Template and click OK.

-
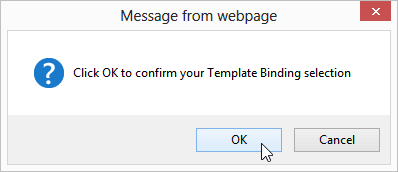
Click OK, then OK again to confirm.
Sync Project
You will now sync the Hyper-V Deployment site with the newly bound Project Standard New template.
Note: Please review Section Previous Uses of Design Sync to remind yourself of the many changes that will be removed when you sync with the new template.
-
Click Settings | Site settings.
-
Click Synchronize with Template.
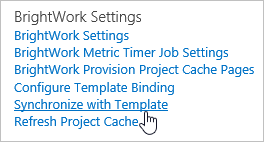
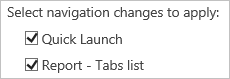
-
Select the Quick Launch and Report – Tabs list checkboxes.
-
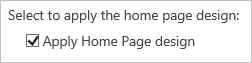
Select the Apply Home Page design checkbox.
-
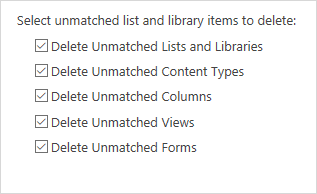
Select all the Delete Unmatched… checkboxes.
-
Click Sync and then OK.
Sync Changes
Now that you have synced your site, you will notice that everything has been reset to the default template appearance. Take a look at the home page and see how the report changes you made are gone. You will notice that all the other changes you added have also been removed.
For example, in the Lists and Libraries guide, you added a Region column to the Project Statement. If you click the Project Statement in the project now, you will see that the Region column and its accompanying data have been removed.
Suggested Exercises
-
Create a new project based on the Project Standard template.
-
Unbind this project and rebind it with the template created in this section.
5. Configure New Template
In this section, you will customize the look and feel of BrightWork templates using the skills you have learned over the course of your training.
Introduction
As you have seen over the course of the previous guides, BrightWork is highly customizable. In this section you will use what you have learned in your training to customize a BrightWork template. This section should serve to reinforce the skills you have acquired throughout the BrightWork training and should be attempted using your own knowledge as much as possible. If you have any difficulties, step-by-step instructions are provided in the following sections and you can refer back to the BrightWork training guides for extra instruction.
Configuration
Complete the following tasks:
-
Add Region column to the Project Statement in your new template.
-
Add a Project Change Requests list to your template.
-
Customize the home page by moving around web parts.
-
Update the Quick Launch to reflect the new Project Change Requests list you have added.
-
Add a Project Wiki and upload a logo picture.
Add Site Column
-
Add the Region site column to the Project Statement list in your new template. For detailed instructions see section Add Site Column to a List in section 2 of the training guide Working with Lists and Libraries.
Add Site List
-
Click Settings | Site contents.
-
Click add an app.
-
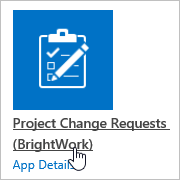
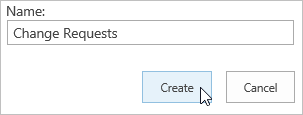
Select a list, e.g. Project Change Requests (BrightWork).
-
Give the list a unique name.
-
Click Create.
For more information about configuring lists for your project, please refer to the Working with Lists and Libraries guide, section 4, Lists.
Customize Home Page
-
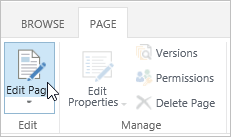
While in your template site’s home page, click Page | Edit Page.
-
Drag and drop some of the web parts to new locations on the page.
-
Click Stop Editing when you are finished.
For more information about customizing BrightWork pages, please refer to the Working with Report Data Sources guide, Create a New Page and Add Reporter Web Part.
Update Quick Launch
-
Click Settings | Site settings.
-
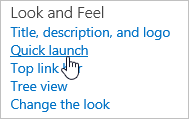
Click Quick Launch.
-
Click the Edit icon next to the list you added earlier.
-
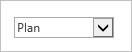
Select Plan from the Heading drop-down selection and click OK.
-
Click the Edit icon next to the Recent entry.
-
Enter # in the ‘Type the Web address:’ text box.
-
Click Delete and then OK.
For more information about customizing the Quick Launch, please refer to the Working with Lists and Libraries guide, Add a List and Update.
Add Wiki
-
Click Site Contents.
-
Click Project Wiki.

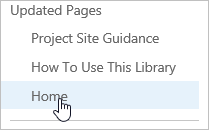
-
Click Home in the Recently Modified section of your Quick Launch.
-
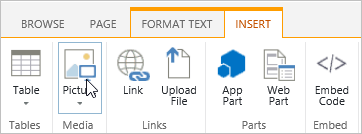
Click Page | Edit.
-
Click Insert | Picture | From Computer.
-
Click Browse and select a suitable logo image for your wiki.
-
Make sure Upload to: is set to Site Assets.
-
Click OK.
For more information about creating and editing the site Wiki, please refer to the Working with Lists and Libraries guide, section 6, Site Wiki.
Suggested Exercises
-
Create a project based on the new template you have created and perform the same tasks suggested at the beginning of this section.
-
Try to avoid referring to the step-by-step instructions.
6. Sync Design Changes to Project
In this section, you use Design Sync to sync the changes you have made you your template to your project.
Sync Design Changes to Project
You will now use Design Sync to Sync your newly customized template with the project you bound it to in Section 4 Bind Project to New Template.
-
In your Hyper-V Deployment project, click Settings | Site settings.
-
Click Synchronize with Template.
-
Select Quick Launch and Report – Tabs list checkboxes.

-
Select the Apply Home Page design checkbox.

-
Click Sync and then OK.
Your Hyper-V Deployment project is now synced to the new template. The changes you have made to the Home Page, the Quick Launch, the Site Wiki, etc. in this guide are now reflected in the project site.
7. Other Configuration Capture Methods
In this section, you will learn about how you can capture and reuse the customization work you learned about in this and other guides.
If you have tailored a project environment you will want to capture this work so that it can be easily reused. BrightWork allows you to capture both individual specific lists, as well as entire project sites.
Reusing Lists
The lists available in BrightWork templates are tailored versions of the core lists BrightWork available from the SharePoint Create page. If you want to reuse a list in a BrightWork template you will first have to create a template from it.
Create a List Template
To create a List Template:
-
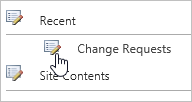
In your Hyper-V Deployment project, click Goals on the Quick Launch.
-
Click List | List Settings.

-
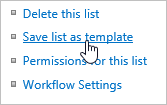
Click Save list as template.
-
Fill out the form and click OK.
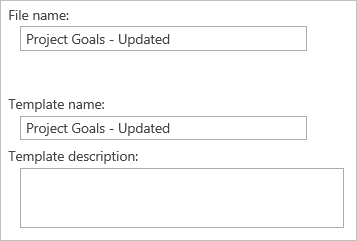
-
Click OK again.
The list will now be available for creation from any site in the site collection.
Create a List from a Template
To create a list, follow the steps below:
-
Click Site Contents.
-
Click add an app and select the list you wish to create.
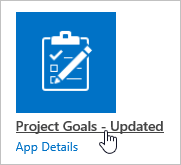
-
Give the list a name and click Create.
Reusing Web Parts
BrightWork allows you to export and import custom web parts. For example, you can create a quite complex BrightWork Reporter setup, export it and then import it. All the settings you selected will be preserved (apart from personal ones).
Export Web Part
-
Click Page | Edit Page.
-
Click Export on the desired Web Part menu.
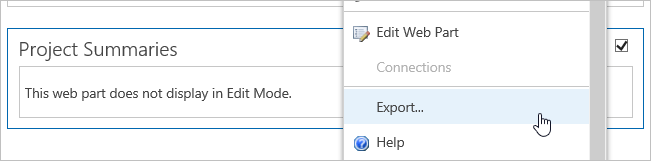
-
Save the .dwp file to an appropriate location.
Import Web Part
-
Click Page | Edit Page on the page where you wish to import your custom Web Part.
-
Click Add a Web Part in the section of the site where you wish to add your Web Part.

-
Click the arrow next to Upload a Web Part.

-
Click Browse and select the required .dwp file.
-
Click Upload.
-
Click Add a Web Part and select the Web Part just uploaded from the Imported Web Parts category.
-
Click Add.
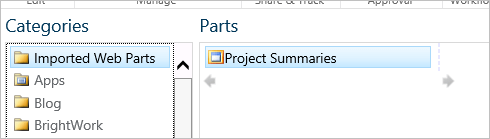
Importing a Web Part in this manner allows you to reuse it on multiple pages in your project. Try adding it to another page to see how this works.
Reusing Sites
One of the big benefits of BrightWork is the concept of reusable sites. The templates in the Templates Area are really just sites that you create a copy of when you want to create a new project site. You can create a template from any of your BrightWork sites and you can even skip the template process and create a project site from another project site.
Heading 4
Create a Template
BrightWork uses a different template process to standard SharePoint. Unlike standard SharePoint, BrightWork templates can be instantiated as real sites. This means you can view and update the template.
To create a template:
-
Navigate to the site collection home page and click Templates Area on the Top Link bar.
-
Click Settings | Create Project Template.
-
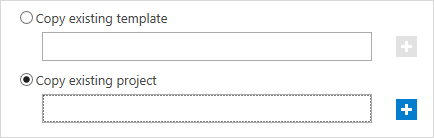
Give the template an appropriate title; the URL name will automatically populate.
-
Select Copy existing project.
-
Click the Browse button to open the Select Site URL dialog.

-
Click Return on your keyboard to populate the Select Site URL dialog with all the available projects.
-
Select the project site you created using the Project Lite template you created and click OK.
-
Click Create.
Copy a Project
As you have just seen, you can create a Template from another site for reuse; however, you can also skip the template process and create a site from an existing project directly.
To create a new project from an existing project:
-
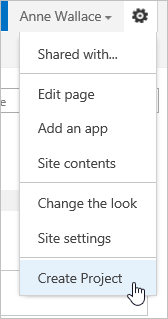
Navigate to the Project Office home page.
-
Click Settings | Create Project.
-
Give the project a name and a URL.
-
Select Copy existing project and click Browse.
-
Click Enter on your keyboard to see a list of available project sites.
-
Select the project site you wish to copy and click OK.

-
Click Create.
Suggested Exercises
-
In a project site you have used for prior exercises, create a new custom list “Action Items” based on the list template “Project Tasks (BrightWork)”.
-
Create a project template of the project site with your own unique name.
Looking for templates on Microsoft 365?
BrightWork 365 lets you plan, manage, and collaborate in Microsoft 365.