Working with Lists and Libraries
This training guide will provide an overview of some of the configuration changes you can make to lists in BrightWork so that your local needs and practices are better supported.
1. Introduction
The level of project management process you will require will vary from project to project. In SharePoint and BrightWork, processes are delivered via lists and libraries contained in project sites.
Prerequisites
You will have created a Training Project Office as per the Create a Training Project Office in the Introductory Guide. Ideally, you will also have completed the Project Manager Training Guide.
Suggested Exercises
At the end of nearly every chapter you will see some Suggested Exercises that you should be able to complete on your own, based on what you have just done.
These suggested exercises will not contain any steps – you will need to apply what you have learned to do the exercise.
We strongly recommend you complete these suggested exercises, as they will help to reinforce what you have just learned.
About Configuring BrightWork and Design Sync
BrightWork includes a feature called Template Design Sync. This feature allows you to make changes to a template, and then pull those changes into all project sites created from the template.
In general, this means that if you want to make changes to a site, that you should make the changes to the template and then pull them into the site via the Design Sync – this is the process this guide will follow.
System Requirements
Microsoft SharePoint 2013 is compatible with Internet Explorer 8 or later. Click here to download the latest version of IE.
Other browsers like Mozilla Firefox or Google Chrome are supported, but may have reduced functionality.
IE 10 users should add their BrightWork site to their Compatibility View list. For more information, see the Setup Your Browser BrightWork help post.
2. Columns
In this section, you will learn about adding and configuring columns in lists.
Overview
A list is really a collection of columns. Each column can contain different types of information (Date, Number, User etc.). End users will see columns as fields on a form.
The majority of the columns in BrightWork lists are site columns. A site column is a column that can be reused in multiple lists. This means you can change the properties of the column in the Site Column Gallery (e.g. add a value to a choice column) and those changes will be replicated in all lists that use the column.
The flipside of this is that if you make changes to a column in a BrightWork list on a local basis (i.e. in the list itself), you can lose those changes if changes are made to the original site column. If you want the local column to have unique properties, you should probably delete the column and add it back as a non-site column. Make sure you give it the same internal name as the column you are replacing it with. This will ensure it appears as expected in reports.
Note: Internal names are displayed on the Column Visibility Settings page, which you will learn about in the Hide Columns section.
Create a Site Column
Before you add a column, think about its purpose; if the information in the column is project level (for example, Region, Department etc.) then you will probably only need to add it to the Project Statement. If you want to report on columns that you add, you will also need to add them to reports and we will cover this in a later guide. In general, it is better to add columns to the Project Statement, as this will give you greater reporting flexibility, as you will see in a subsequent section.
If the column is one that will be reused in multiple lists, and may also require updates (for example, a choice column that contains a list of customers or suppliers), then it is probably best to create it as a Site Column. This will allow you to update the values in the column and have them replicated in every list that uses the column.
-
Click Home on the site collection’s Top Link Bar to navigate to the site collection home page.
-
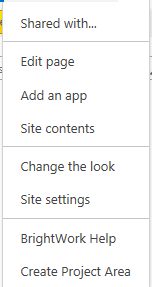
Click Settings | Site settings.
-
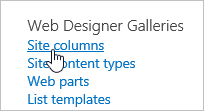
Click Site Columns.
-
Click Create.

-
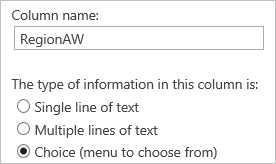
Enter a title in the Column name field (for example RegionYOURINITIALS etc).
Note: The column internal name must be unique, i.e. you cannot have two columns in the one report with the same column internal name.
The column internal name cannot contain leading numbers or unsupported characters. The only supported characters are letters, numbers, underscores and spaces. You can update the display name immediately after. -
Select Choice.
-
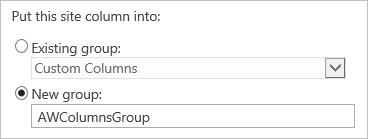
Select New group and enter a unique group name for your site columns.
-
Enter some values, for example:
ASIA
EMEA
USA -
Clear the Default value.
-
Click OK.
Add Site Column to a List
Next, you will add the Region site column you just created to the Project Statement list in your Project Lite, Project Standard and Project Structured templates and to the Projects Tracker list in your Project Office template.
-
Click Templates Area on the top link bar and navigate to the Project Lite template you created in the Create a BrightWork Training Project Office guide (it should have your initials in the title).
-
Click Site Contents.
-
Click Project Statement.
-
Click List | List Settings.

-
Click Add from existing site columns.

-
Select your site column group, your column and click Add.
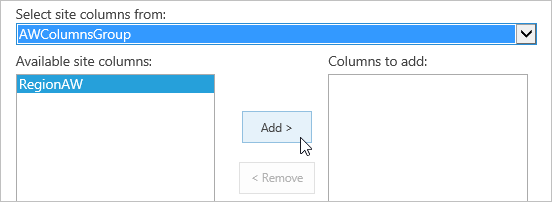
-
Click OK.
Note: By default, when you add a column to a list, SharePoint positions it at the bottom of the page. You will remedy this next. -
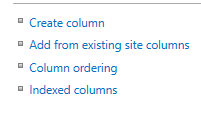
Click Column ordering.
-
Select 2 beside the Region column (or whatever you called the added column).
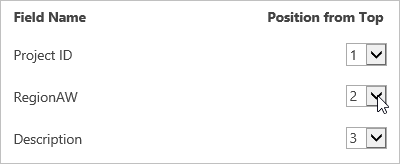
-
Click OK.
The Region column you created must also be added to your Project Standard, Project Structured and Project Office templates.
Note: It is very important that you add this column to these templates as you will use it in a later exercise.
To add this column to the Project Standard template:
-
Click Templates Area on the top link bar and navigate to the Project Standard template you created (it should have your initials in the title).
-
Click Site Contents.
-
Click the Project Statement app.
-
Click List | List Settings.
-
Click Add from existing site columns.
-
Select your column, click Add and click OK.
-
Click Column ordering and set the column ordering to 2.
To add this column to the Project Structured template:
-
Click Templates Area on the top link bar and navigate to the Project Structured template you created (it should have your initials in the title).
-
Click Site Contents.
-
Click the Project Statement app.
-
Click List | List Settings.
-
Click Add from existing site columns.
-
Select your column, click Add and click OK.
-
Click Column ordering and set the column ordering to 2.
To add this column to the Project Office template:
-
Click Templates Area on the top link bar and navigate to the Project Office template you created (it should have your initials in the title).
-
Click Edit Tracker on the Quick Launch.
-
Click List | List Settings.
-
Click Add from existing site columns.
-
Select your column, click Add and click OK.
-
Click Column ordering and set the column ordering to 2, then click OK.
Add a Column Directly to a List
In the section above, you added a site column to multiple lists. While site columns are very powerful, there may also be situations where you need to add a column directly to a list (skipping the Site Column Gallery mentioned earlier), so as to deliver a requirement unique to the project in question.
-
Click Training Area on the top link bar and navigate to the Project Office site you created.
Click the Quick Launch link to the site you created using the Project Lite template. It should be called Hardware Upgrade. -
Click Tasks Update on the Quick Launch.
-
Click List | List Settings.
-
Click Create Column.

-
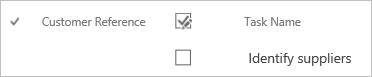
Call all the columns: Customer Reference.
Note: When you create a column, the initial column name should not have spaces in it or a number as a leading character. This is to ensure the column functions correctly in BrightWork reports. You can update the display name after creating the column. -
Leave Single line of text selected.
-
Click OK.
-
Click the column name.
-
Change the name to Customer Reference.
-
Click OK.
-
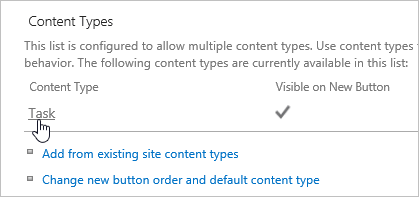
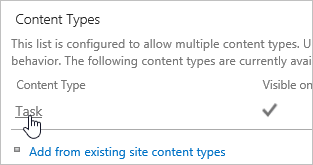
Scroll up to the Content Type section and click Task.
-
Click Column Order at the bottom of the page.
-
Select 2 for the Customer Reference column and click OK.
Hide Columns
One of the things BrightWork adds to SharePoint is the ability to easily hide columns on a list by list basis and on a form type by form type basis (there are three form types: New, Edit and Display).
For example, you may do this because you want to force a choice value in a list and not give the user the option to change it. Another advantage of this is that you can reduce the complexity of a list (by hiding columns) and retain the option to bring back this complexity (by unhiding the same columns) without having to delete and add back columns with the correct name.
Note: If you think you will need to hide columns in a list, you should be aware that column visibility settings belonging to user-added Site Columns, or out-of-the-box Site Columns that have had their properties edited, are not retained when creating projects.This means you will have to reset your desired column visibility settings after creating the project. Alternatively, you can add the columns directly to the list, as you have just done in the proceeding section.
-
Click Templates Area on the top link bar and navigate to the Project Standard template you created (it should have your initials in the title).
-
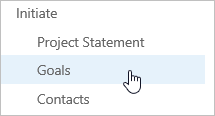
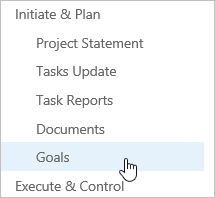
Click Goals on the Quick Launch.
-
Click List | List Settings.
-
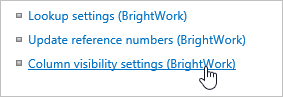
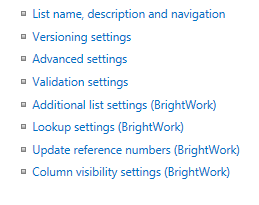
Click Column visibility settings (BrightWork).
-
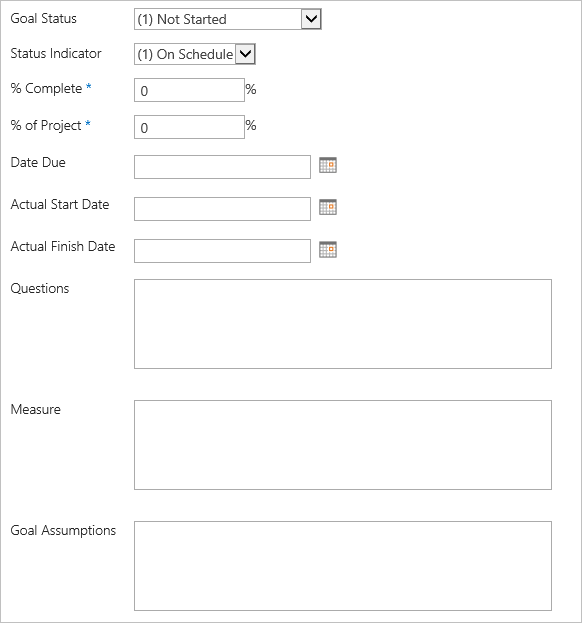
Select the Hide from Forms and Views checkbox for the following columns:
Actual Finish Date
Actual Start Date
Goal Assumptions
Measure
Owner
Questions -
Click OK.
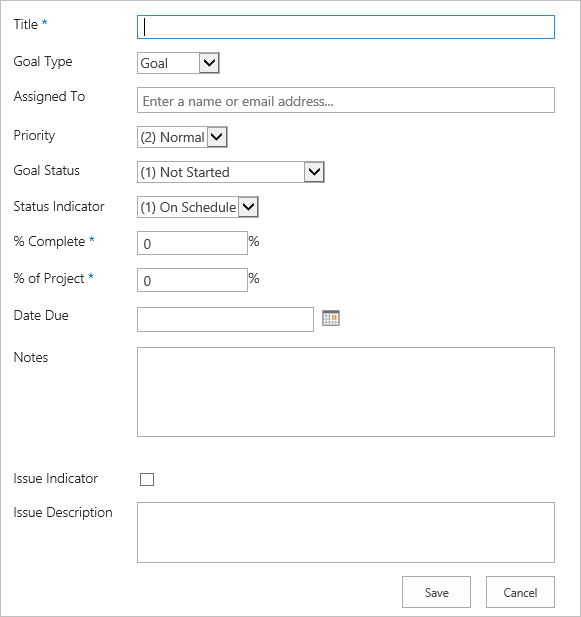
Before Hiding Columns
After Hiding Columns
Calculated Columns
A calculated column enables you to create a formula that includes data from other columns and perform functions on that data, for example to calculate dates and times, to perform mathematical equations, or to manipulate text.
In this section you will add a calculated column that automatically calculates how long a task is going to take to complete, based on the information entered into the Start Date and Finish Date columns.
-
Click Tasks Update on the Quick Launch of your Project Standard template.
-
Click List | List Settings.
-
Click Create column.
-
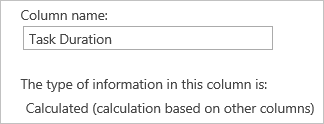
Give the Column a name, e.g. TaskDuration.
-
Select Calculated (calculation based on other columns).
-
Copy and paste the below formula into the Formula box.=IF(ISERROR(DATEDIF([Start Date],[Finish Date],”D”)),0,DATEDIF([Start Date],[Finish Date],”D”)).
Note: This formula calculates the difference between the Start and Finish dates. If there is no data in one or both of these columns, 0 is displayed instead of an error message.
An important thing to remember about calculated columns is that you use the display names of other columns if they are used in the calculation.
Also note that calculated columns do not appear on New or Edit forms – they only appear on the Read version of the list form.
For more information on constructing formulas, please see Introduction to data calculations in the SharePoint Server online help. -
Select Number (1, 1.0, 100).
-
Click OK.
-
Click the link to the TaskDuration column.
-
Put a space between Task and Duration and click OK (this creates the friendly display name of the column).
Note: It is best practice not to add a calculated column to a datasheet view.
Note: Calculated columns are another very powerful SharePoint feature that this exercise has really only scratched the surface of.
Choice Indicator Columns
The BrightWork Choice Indicator Icon column allows you to map the URL of an image file to a value in a choice column in a BrightWork or SharePoint list. You can use existing SharePoint or BrightWork icons, to map the images to values, or you can use your own images.
Note: See the BrightWork Reporter Icons help topic for a list of some out-of-the-box BrightWork-added image URLS you can use.
-
In your training Project Standard template, click Tasks Update on the Quick Launch.
-
Click List | List Settings.
-
Click Create Column.
-
Give the column a name (e.g. PriorityIcon2).
-
Select Choice Indicator Icon.
-
Select Priority from the Based on Choice Column menu.
-
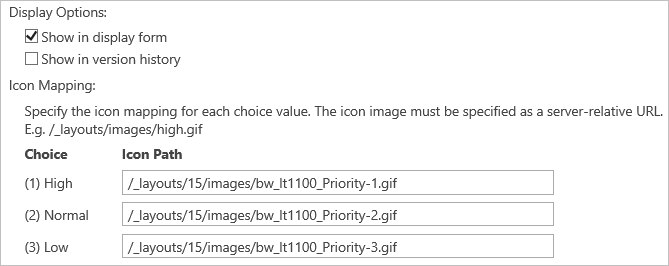
Select Show in Display Form.
-
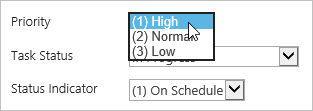
Copy and paste the icon URLs into the corresponding field:
High /_layouts/15/images/bw_lt1100_Priority-1.gif
Normal /_layouts/15/images/bw_lt1100_Priority-2.gif
Low /_layouts/15/images/bw_lt1100_Priority-3.gif -
Unselect Add to default view.
-
Click OK.
-
Click PriorityIcon2 and change the display name of the column to Priority Icon and click OK.
-
Click Task in the Content Types section.
-
Click Column Order.
-
Select 1 beside Priority Icon and click OK.
Suggested Exercises
-
Create new Site Column “Contact Role”, make it a Choice column, and add 3 choices of your own, e.g., “Vendor”, or “Core Stakeholder”.
-
Add the column “Contact Role” to the existing list “Project Contact”.
-
Configure “Contact Role” to be in the 10th position from the top in the form.
3. Views
In this section, you will learn how to modify and create list views.
Overview
A view is a type of list-specific report. Every list can have multiple views of the data contained in the list. All the lists supplied with BrightWork include a series of custom views, all designed to better help you manage projects.
You can use views to see the items in a list or library that are most important to you or that best fit a purpose. For example, you can create views of the files that were created most recently, of the list items that apply to a specific department or of the files or items created by one person. After you create a view, it is always available when you look at a list or library.
Note: List views are list and site specific, i.e. a view can only show items from one list or library at a time. If you want to display information from multiple lists and libraries in one or more sites, you should use BrightWork Reporter.
Modify a View
-
Click Training Area on the top link bar and navigate to the Project Office site you created.
-
Click the Quick Launch link to the site you created using the Project Lite template, it should be named Hardware Upgrade.
-
Click Tasks Update on the Quick Launch.
-
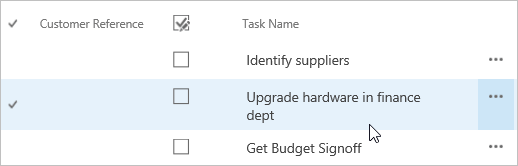
Select the All Tasks view.
-
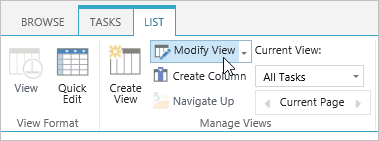
Select List | Modify View.
-
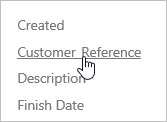
Select 1 beside Customer Reference.
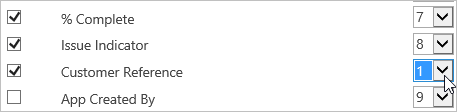
-
Click OK.The Reference column will appear in the view.
The Region column you added to your Project Office in the Add Site Column to a List section, should also be added to the Projects Tracker view.
-
Click Templates Area on the top link bar and navigate to the Project Office site you created.
-
Click View Tracker on the Quick Launch.
-
Click List | Modify View.
-
Select the Region column you added earlier and set the position from left to 2.
-
Click OK.
Create a View
Next, you will create a Completed Items view that shows the Tasks Duration column.
-
Click Templates Area on the top link bar and navigate to the Project Standard template you created (it should have your initials in the title).
-
Click Tasks Update on the Quick Launch.
-
Click List | Create View.
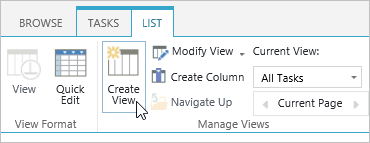
-
Click Standard View.

-
Give the view a name (for example, Completed Items).
-
Unselect Start Date, Finish Date, and % Complete in the Columns section.

-
Scroll down to the Filter section, select Task Status and is equal to, and enter Completed in the field as shown.
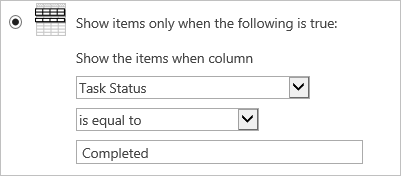
-
Click OK.
Suggested Exercises
Create a new view for the Project Goals list that will display only Completed items.
4. Lists
In this section, you will learn how to add and configure lists with the main SharePoint and BrightWork options.
Overview
As you know, a SharePoint list is a means for collecting and representing data in a SharePoint site. Typically, the data is collected either via a form-like interface or a spreadsheet-like interface called the Datasheet, and displayed in a list view or a BrightWork report.
Out of the box SharePoint includes a number of list types, including Issues and Tasks. Out of the box BrightWork adds some extra lists, including Project Issues, Project Risks, and Project Goals etc. BrightWork also includes reports that show data from multiple lists and sites.
The templates supplied with BrightWork contain varying amounts of project management in the form of lists; you can add, remove and configure these lists as your needs arise.
Add List and Update
In this section you will add the BrightWork Project Goals list. You will also ensure that the list appears in the correct location on the Quick Launch.
Add List
-
Click Templates Area on the top link bar and navigate to the Project Lite template you created (it should have your initials in the title).
-
Click Settings | Site Contents.
-
Click add an app.
-
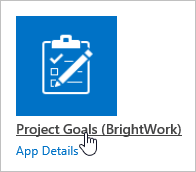
Click Project Goals (BrightWork).
-
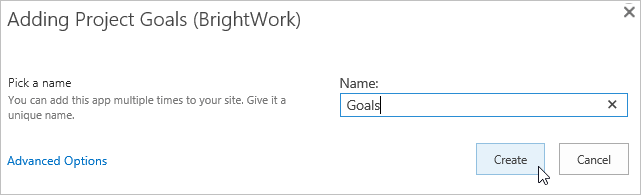
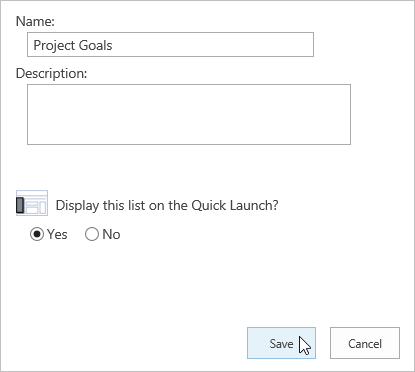
Give the list a name (e.g. Goals) and click Create.
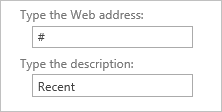
The list will be added to the Quick Launch in a grouping of its own – the standard SharePoint Recent grouping; however, we want the Quick Launch to reflect an inherent project management process.
-
Click Settings.

-
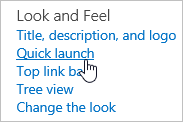
Click Quick Launch.
-
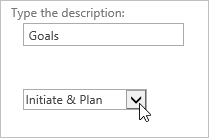
Click the Edit button beside the list you just added.
-
Select Initiate and Plan from the Heading menu and click OK.
-
Click the Edit button beside Recent.
-
Enter # in the Web Address textbox.
Note: Due to a SharePoint requirement, Quick Launch sections cannot be removed without a web address.
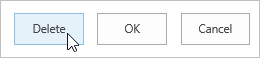
-
Click Delete and OK to confirm.
Add Issue Indicator Icon and Issue Description Columns
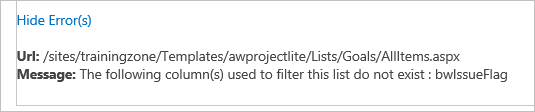
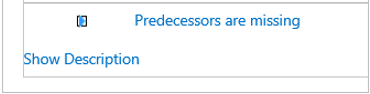
The lists in BrightWork templates include the Issue Indicator and Issue Description columns. These columns allow users to flag items as issues; however, BrightWork server-lists do not contain these columns. As BrightWork Issue reports use the Issue Indicator to display items marked as an issue, you must add these columns to any BrightWork server-lists you add, otherwise Issue reports that query these lists will display an error. Click Issues Reports on the Quick Launch and then Show Error(s) on the Open Issues web part to see the error in question.
To add the Issue Indicator and Issue Description columns:
-
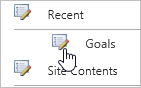
Click Goals on the Quick Launch.
-
Click List | List Settings.
-
Click Add from existing site columns.
-
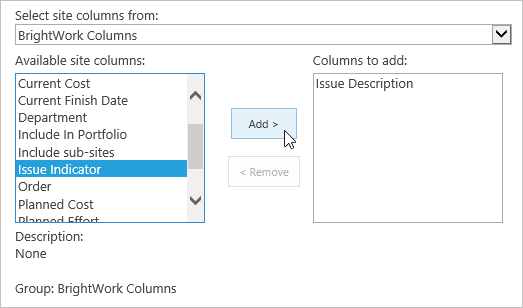
Select BrightWork Columns in the ‘Select site columns from’ section.
-
Select Issue Description and click Add.
-
Select Issue Indicator and click Add.
-
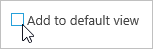
Deselect Add to default view.
-
Click OK.
Now when you return to the Issues Reports page, you will see that the error has gone.
Delete Owner Role Column
As described in the Delete a Column section, there are occasions when deleting a column is preferable to hiding a column, for example, if the requirements of the project change and certain elements no longer need to be tracked. In this next exercise, you will delete a legacy column that exists in the Project Goals app.
Note: When a column is deleted from a list, any data that was stored in the column will also be deleted.
Note: A lookup column is one which uses data from another column.
To delete a column:
-
Click Goals on the Quick Launch of your Project Lite template.
-
Click List | List Settings.
-
Click Owner Role in the Columns section.
-
Click Delete, then click OK.
Save List as Template
In previous section you added columns and views to lists. In this section you added two columns. You can easily save and reuse this sort of configuration work by creating a list template..
To save the list as a reusable template:
-
Click Goals on the Quick Launch of your Project Lite template.
-
Click List | List Settings.
-
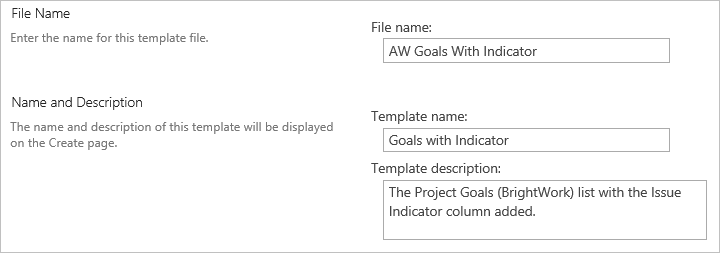
Click Save list as template.
-
Give the list a filename, name and description, and choose to not include content.
-
Click OK.
The list will now be available in the List Template Gallery, ready for use in future projects.
Hide Lists
You may look at a template and decide that it has too much project management for your purposes. Your immediate inclination may be to delete the lists that you don’t want; however, it generally works out better in the long run if you just hide a list by removing it from the Quick Launch, as this means it is much easier for you to bring the list back should you so decide.
To do this you would simply delete the link from the Quick Launch, like you just did with the Recent grouping in the previous exercise.
Rename a list
The lists supplied with the BrightWork templates have quite generic names. One of the more common customizations you may make include changing the name of a list to match a local process.
-
Click Goals on the Quick Launch of your Project Lite template.
-
Click List | List Settings.
-
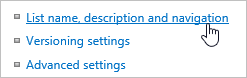
Click List name, description and navigation.
-
Rename the list to Project Goals and click Save.
Note how the Quick Launch title automatically updates when you change the list title.
BrightWork List Settings
BrightWork list settings give you access to BrightWork list or library settings, such as Referencing and Email notification. These settings are accessed from the standard SharePoint list settings page.
-
Click Issues Update on the Quick Launch of your Project Lite template.
-
Click List | List Settings.
-
Click Additional list settings (BrightWork).
-
Select Yes under Enable Reference Numbering.
-
Enter ‘Is-‘0000 in the Reference number format field.
Note: See the Reference Formatting BrightWork help topic for more information about constructing the reference format. -
Select Yes under Notify user when they are assigned an item.
-
Click OK.

Suggested Exercises
Navigate to your Project Standard template and rename the existing “Risks” Quick Launch link and list title to “Risk Register”. Add Reference numbering to this list. Turn on Versioning. Add the Issue Indicator and Issue Description site columns to the Goals list.
5. Libraries
In this section, you will learn about the basics of configuring document libraries.
Document Libraries are where files (such as Microsoft Word documents) relating to the project are stored. SharePoint allows you to upload and collaborate on these documents.
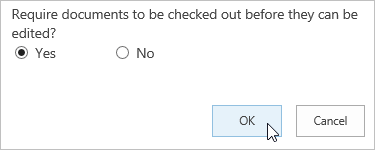
Enable Check-Out
Requiring check-out prevents multiple people from making changes to a document at the same time, which can create conflicts over changes and lead to confusion.
-
Click Templates Area on the top link bar and navigate to the Project Lite template you created (it should have your initials in the title).
-
Click Documents on the Quick Launch.
-
Click Library | Library Settings.

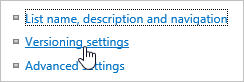
-
Click Versioning settings.
-
Select Yes in the Require Check Out section.
-
Click OK.
Enable Versioning
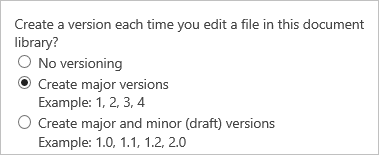
Versioning in lists and libraries enables you to track and manage information as it evolves and to view and recover earlier versions if necessary. Versioning must be enabled on a list by list or library by library basis (although versioning settings are retained in templates).
Essentially, versioning means that every time a Microsoft Office document in a library is edited, a new version will be created and it will be possible to restore previous versions.
For an in-depth overview of versioning, please see the Enable and configure versioning for a library SharePoint Server online help topic.
-
Click Documents on the Quick Launch of your Project Lite template.
-
Click Library | Library Settings.
-
Click Versioning settings.
-
Select Create major versions in the Document Version History section.
-
Ensure Yes is selected in the Require Check Out section and click OK.
6. Site Wiki
In this section, you will create a wiki for your site utilising the Site Assets library.
Overview
A Project Wiki allows you to store relevant information on your site that is easily updated and accessed. Common uses for the Wiki are to store project information, requirements, expanded goals lists, etc.
BrightWork makes it easy to establish a project wiki on your template that will be synced to your project sites.
SharePoint contains a special library for storing static images and files for use in the site Wiki and elsewhere.
Create Site Wiki
-
Click Templates Area on the top link bar and navigate to the Project Lite template you created (it should have your initials in the title).
-
Click Site Contents.
-
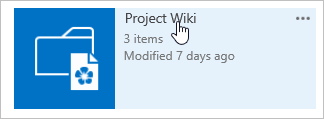
Click the Project Wiki app.
Note: You now have a new section on your Quick Launch listing the various files stored in the Wiki. This allows you to keep track of recently edited pages and does not appear on the Project Home page. You should add to this wiki to the quick launch for easier access.
The default Project Wiki contains documents that will help you edit and create your wiki, the use of which goes beyond the scope of this document.
Suggested Exercise
Edit your Wiki home page to reflect details about your own company and projects.
7. Sync your Design Changes to Child Sites
In this section, you will sync the changes you made in this guide to the sites created from the templates in which you made the changes. You will also make some list data changes to the projects sites that use the design changes.
Overview
To date you have been working in the templates you used to create your sites. Now you will pull the changes you made into the sites created from each template.
Imagine a scenario where your organization has been using BrightWork for a number of months. You have a couple of main templates that are used in a large number of projects. You and the other project managers sit down and agree a list of improvements to the templates. This would be fine for all new projects going forward, but what about all the existing projects that were created using the old, unimproved template?
With BrightWork Design Sync, you can make changes to a template and pull some or all of the changes into sites created from the template. This saves you a lot of time and ensures that the changes are implemented correctly. To learn more about Design Sync, see the About Template Design Sync BrightWork help topic.
Sync Changes to the Project Office Site
The changes you made to this template were:
-
Added the Region site column to the Projects Tracker list.
-
Modified the All Items view in the Projects Tracker list.
To sync the changes:
-
Navigate to the project site you created from the Project Office template. It should be named Project Office.
-
Click View Tracker on the Quick Launch.Note the absence of the Region column.
-
Click Settings | Site settings.
-
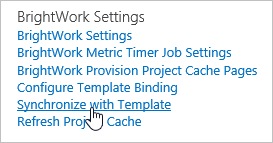
Click Synchronize with Template.

-
Leave everything as is and click Sync.
-
Click OK to confirm.The Design Sync Log should display.
-
Click Edit Tracker on the Quick Launch and click List | Modify View.
-
Select the Region column and set the ‘Position from Left’ to 2.
-
Click OK.
-
Select a region for each item in the datasheet.
Sync Changes to the Project Lite Site
The changes you made to this template were:
-
Added the Region Site Column to the Project Statement.
-
Modified the All Tasks view in the Tasks List.
-
Added the BrightWork Project Goals list.
-
Renamed the Project Goals list.
-
Deleted the Owner Role column.
-
Configured the BrightWork list settings to enable Referencing.
-
Enabled Check Out and Versioning on the Documents library.
If you recall, you also added a column called Customer_Reference to the site created from the Project Lite template. In this exercise, you will also see how Design Sync can remove unmatched features in the destination site. While a feature like this should be used with care, it can help you to ensure that wheels are not being reinvented!
To sync these changes:
-
Click Training Area on the Top Link bar and then click the link to your Project Office on the Quick Launch.
-
Click the Quick Launch link to the site you created with the Project Lite template – it should be called Hardware Upgrade.
-
Click Project Statement on the Quick Launch confirm there is no Region column.
-
Click Tasks Update and confirm the Customer Reference Column you added is still there.
-
Click Settings | Site Settings.
-
Click Synchronize with Template.

-
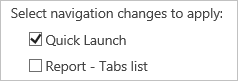
Select the Quick Launch checkbox.You need to do this because you also want the Goals list you added to appear on the Quick Launch of the site.
-
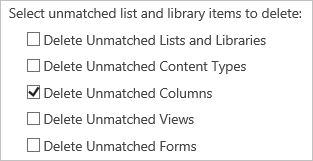
Select Delete Unmatched Columns.This is the feature that will delete the Customer Reference column you added to the Tasks list in the site.
-
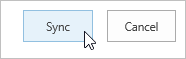
Click Sync.
-
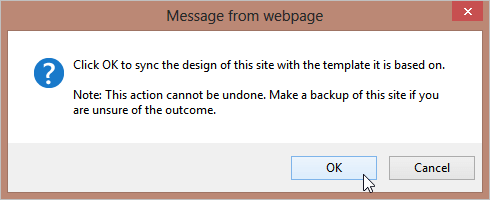
Click OK to confirm the sync.
-
Click on the link to view the Design Sync Log.
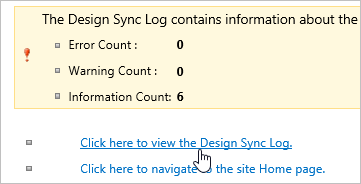
The Design Sync Log informs you about the main changes that were made and any issues that the sync raised.
-
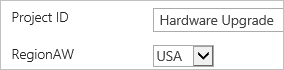
Click Project Statement.
-
Confirm that the Region column has been added.
-
Click Edit Item and select USA from the Region column.
-
Click Save.
Sync Changes to the Project Standard Site
The changes you made to this template were:
-
Added the Region Site Column to the Project Statement.
-
Hid columns in the Goals list.
-
Added a Calculated column to the Tasks list.
-
Added a Choice Indicator column to the Tasks list.
-
Added a Completed Items view to the Tasks List.
To sync these changes:
-
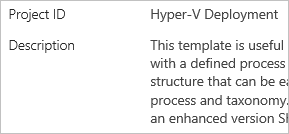
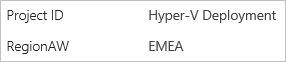
Navigate to the site you created using the Project Standard template. It should be called Hyper-V Deployment.
-
Click Tasks Update on the Quick Launch. Note there is no Task Duration column.

-
Click Project Statement and note that there is no Region column.
-
Click Settings | Site settings.
-
Click Synchronize with Template.
-
Click Sync and OK.
-
Click Tasks Update.
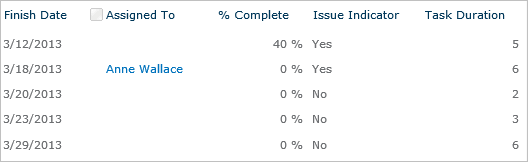
Note that the Task Duration column has been added.
-
Click Project Statement on the Quick Launch.Note that there is now a Region column in the Project Statement.
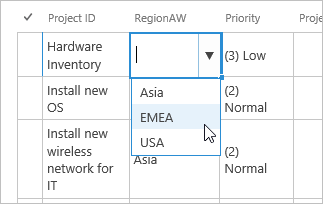
-
Click Edit Item and select EMEA from the Region column.
Click Save.
Click Tasks Update on the Quick Launch.
Click List | Quick Edit.
-
Click Save.
-
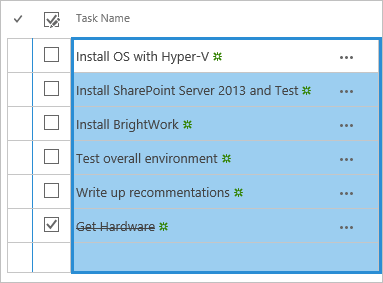
Click Tasks Update on the Quick Launch.
-
Click List | Quick Edit.
-
Select the items in the Task Name column, and click Ctrl+C on your keyboard.
-
Reselect the items and click Ctrl+V on your keyboard.
Note: The reason for copying and pasting the column is that the icon will not display on the forms until the item has been edited. This way you are editing all the items in the list simultaneously. -
Click Stop editing this list.
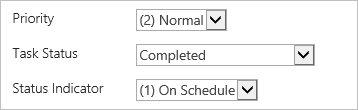
To show this icon in an item, you need to set the priority to high or low. -
Click the Install OS with Hyper-V task.
-
Set the Priority to High.
-
Click Save.
Now, if someone is assigned a high priority item, they won’t be able to miss that fact.
Sync Changes to the Project Structured Site
The changes you made to this template were:
-
Added the Region Site Column to the Project Statement
To sync the changes:
-
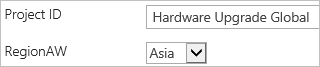
Navigate to the project site you created from the Project Structured template. It should be called Hardware Upgrade Global.
-
Click Project Statement on the Quick Launch. Note the absence of the Region column.
-
Click Settings | Site settings.
-
Click Synchronize with Template.
-
Leave everything as is and click Sync.
-
Click OK to confirm.The Design Sync Log should display.
-
Click the Project Statement link on the Quick Launch and you should see that the Region column has been added.
-
Click Edit Item and click Asia from the Region Column.
-
Click Save.
8. Add a SharePoint Designer Workflow
In this section, you will learn about workflows and create a basic one using SharePoint Designer.
Workflows can be as simple or as complex as your business processes require. You can create a workflow that the user initiates, or a workflow that is initiated automatically based on an event, such as when a list item is created or changed.
About Workflows
A workflow is a series of actions that correspond to a work process, such as the process for purchase orders.
There are three levels of workflow:
-
Out-of-the-box: SharePoint Foundation includes only the Three-state workflow. This workflow is not hugely useful. As the training server is built on SharePoint foundation we will not demonstrate it. See the SharePoint Foundation Three-state workflow page in the SharePoint help for more information on the out-of-the-box workflows.
-
SharePoint Designer 2013: SharePoint Designer allows you to build quite complex and useful workflows without having to write any code.
-
Visual Studio
Visual Studio allows developers to code reusable workflows. Achieving this is beyond the scope of this document! Please see the Developing Workflows with Visual Studio article for more information.
Note: SharePoint Designer workflows can go from the very simple to the very complex. This exercise is probably as simple as it gets and is really designed to introduce you to the “condition leads to automated action” concept of workflows.
Click this link for a longer introduction to SharePoint Designer workflows.
SharePoint Designer 2013 is available as a free download from Microsoft.
-
Click Templates Area on the top link bar and navigate to the Project Lite template you created (it should have your initials in the title).
-
Click Tasks Update on the Quick Launch.
-
Click List | Workflow Settings | Create a Workflow in SharePoint Designer.

-
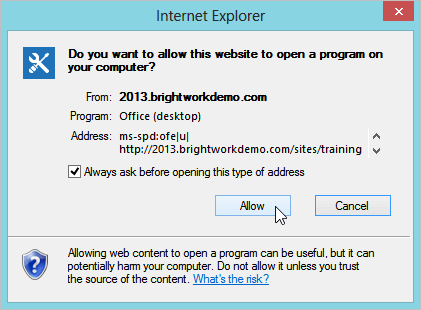
Click Allow if you see the below message.
-
Click Yes.
-
Enter your login details and click OK.
-
Enter the below Name and a Description.
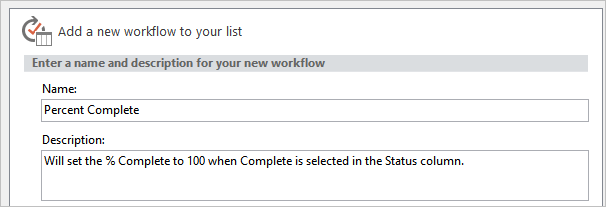
-
Click OK.
-
Click Condition | If current item field equals value.
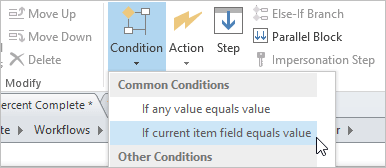
-
Click field and select Task Status.
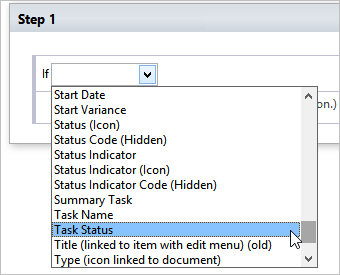
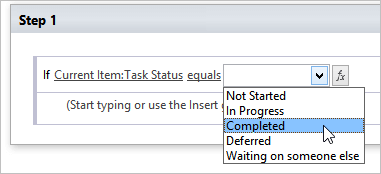
-
Click Value and select Completed.
-
Click Action | Set Field in Current Item.
-
Click field and select % Complete.
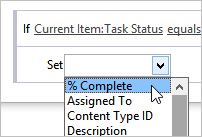
-
Click value and enter 1.

-
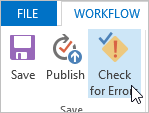
Click Check for Errors.
Note: While it is unlikely that there will be any issues in such a simple workflow, it is always a good idea to check for errors.
-
Click Percent Complete on the SharePoint Designer breadcrumbs.

-
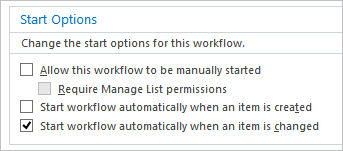
Unselect Allow this workflow to be manually started and select Start workflow automatically when an item is changed.
-
Click Save and then Publish.

-
Return to the Tasks list and select the All Tasks view.
-
Open one of the items for editing, select Completed from the Status column and click Save.
The % Complete will automatically update to 100% (you may have to click F5 on your keyboard to see this).
Suggested Exercise
Add the Percent Complete workflow to the site created from the Project Lite template.
Looking for templates on Microsoft 365?
BrightWork 365 lets you plan, manage, and collaborate in Microsoft 365.