Create a BrightWork Training Project Office
In this training guide you will create your own Project Office. You will also learn how to use the templates in the BrightWork environment.
1. Introduction
The purpose of this guide is to enable you to create your own Project Office for training or demonstration purposes, while showing you how to create templates and project sites in BrightWork.
Overview
After you complete this guide you will have created four Templates:
-
(Your Initials) Project Office
-
(Your Initials) Project Lite
-
(Your Initials) Project Standard
-
(Your Initials) Project Structured
You will also have created a Project Office in the Training Area with the below structure:
-
(Your Initials) Project Office
-
Hardware Upgrade (using your Project Lite template)
-
Hyper-V Deployment (using your Project Standard template)
-
Hardware Upgrade Global (using your Project Structured template)
BrightWork Training Environment
For the best experience, you should take your training in your local environment using the BrightWork Image for the Customer (BIC). The BIC is a tailored BrightWork site collection created for training and in-house development purposes. It is also used for creating BrightWork Online site collections.
The key differences between the BIC and the default out-of-the-box BrightWork site collection (created from Central Administration) include:
Training Area
The Training Area provides training for the main project management roles in the organization:
-
Team Members
-
Project Managers
-
Senior Executives
-
BrightWork Administrators
Sample Area
The Sample Area provides an example of a Project Office hierarchy with project sites and work items.
Templates
The Templates Area is fully populated with a single instance of every BrightWork template (including download templates) and templates for training.
Look and Feel
The BIC has a custom navigation approach for the Home page, Training and other pages.
Please contact the BrightWork Support team for more information about the BIC.
System Requirements
See below for general client system requirements to take BrightWork training.
-
Microsoft SharePoint 2013 requires Internet Explorer 8 or later. You can download the latest version of IE here.
-
IE 10 users should add their BrightWork site to their Compatibility View list.
2. Create Templates
In this section you will create the four templates you will use to create your Project Office Hierarchy.
Create Templates
Note: You should use a naming convention for your templates that will make them easy to distinguish and identify. We recommend using a mix of your initials and the template name, e.g. AW – Project Office.
-
Click Templates Area on the Top Link bar.
-
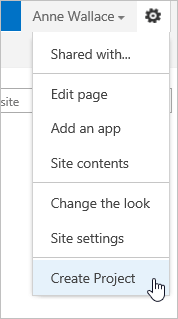
Click Settings | Create Project Template.
-
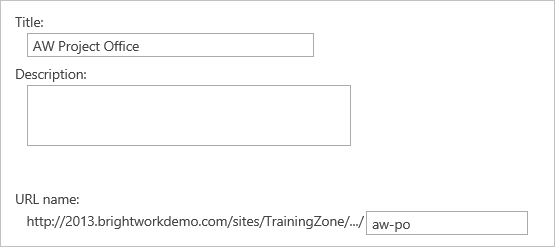
Enter a title that uses your initials and Project Office, e.g. AW – Project Office.
Note: When creating templates, the URL name field is automatically populated based on the Title you enter. -
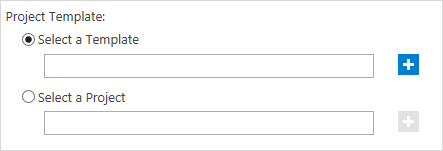
Choose Select a Template and click the Browse button.

-
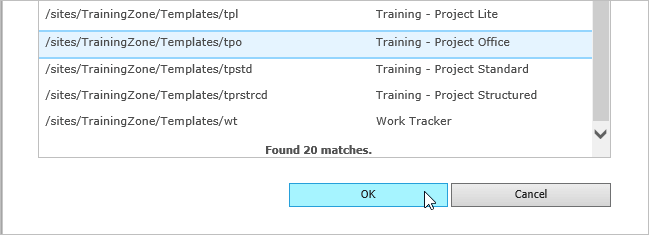
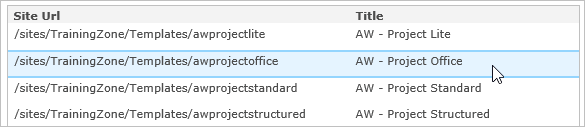
Click Enter on your keyboard to see a list of available templates.
-
Select the Training – Project Office template.
-
Click Create.
-
Wait for the template to be created.
-
Double-click the Back button on your browser or keyboard to return to the New Project Template form in the Templates Area.
-
Create copies of the Training – Project Lite, Training – Project Standard and Training – Project Structured templates, using the naming convention specified above.
Note: Make sure to click the Browse button and select the correct Training template each time you create a copy.
3. Create Project Office Hierarchy
Next you will create a project office hierarchy.
Create Project Office Site
-
Click Training Area on the Top Link bar (click Browse if the Top Link bar is hidden).

-
Click Settings | Create Project.

-
Give your Project Office a Title that you will remember and a URL name. You can use your initials again.
Note: URL names do not automatically populate when creating sites – keep URL names short.
-
Click the Browse button beside Select a Template to open the template site picker.
-
Click Enter on your keyboard to display all the available templates.
-
Double-click on the copy of the Training – Project Office template you created.
-
Click Next on next few pages and then click Finish.
Your Project Office will appear shortly.
We recommend that you bookmark your project office (click Ctrl-D on your keyboard).
Create Project Sites
This section will guide you through creating three sites in the Project Office using the Training – Project Lite, Training – Project Standard, and Training – Project Structured Templates.
-
Click Settings | Create Project on the Project Office site you just created.
-
Call the project ‘Hardware Upgrade’.
-
Enter a description and a URL Name.
-
Enter your name in the Project Manager field and click Enter on your keyboard.
-
Note: Your username is displayed in the top right of the screen.
-
Click Browse and select the Project Lite template you created – the one with your initials.
-
Click Create.
-
Double-click Back on your browser or keyboard to return to the New Project Web form and call the next project ‘Hyper-V Deployment’.
-
Ensure you are the Project Manager.
-
Click Browse and select the Project Standard template you created- the one with your initials.
-
Click Create.
-
Double click Back on your browser or keyboard to return to the New Project Web form and call the next project ‘Hardware Upgrade Global’.
-
Ensure you are the Project Manager.
-
Click Browse and select the Training – Project Structured template – the one with your initials.
-
Click Create.
Looking for templates on Microsoft 365?
BrightWork 365 lets you plan, manage, and collaborate in Microsoft 365.