
A project schedule outlines the tasks, activities, milestones, and resources required to complete the project.
A well-defined schedule improves communication and collaboration by ensuring everyone knows what needs to happen and when.
This article explains how to define, sequence, estimate, and develop a project schedule.
You’ll also see how to leverage key capabilities in BrightWork to plan and control the schedule using SharePoint On-Premises.
What is Project Scheduling?
As mentioned above, a project schedule outlines the tasks, activities, milestones, and resources needed for a successful project
The project schedule is prepared during the planning phase of the project. The schedule is continuously updated as work progresses and more information becomes available about durations and deliverables.
As a project manager, you’ll pick a scheduling technique, such as the Critical Path Method, add key information like dates and resources, and generate a plan.
Depending on the scope and complexity of the project, you’ll likely create one of three types of schedules:
-
The master schedule lists tasks and resources at a high level in a calendar. This approach is ideal for small projects and is useful for communicating with stakeholders.
-
The milestone schedule is a summary of major milestones and deliverables. Typically presented as a Gantt chart, this schedule is suitable for larger projects with multiple deadlines.
-
The detailed schedule is used daily for managing tasks. This schedule is suitable for complex, multi-phase projects and may include sub-schedules for each phase of the project. The detailed schedule is often presented as a PERT chart, which depicts tasks, milestones, and dependencies.
In addition to the schedule, you may also need to create a schedule management plan.
The schedule management plan describes how the schedule was created, for example, scheduling techniques and assumptions, and how it will be managed during the project.
As you’ll see later in the article, using project management software like BrightWork to plan, manage, and update the project schedule saves time and reduces errors!
It’s also easier to present the schedule in various ways for different stakeholders, for example, a timeline or a Gantt chart.
In the next section, we’ll take a closer look at how to plan your schedule
Planning Your Project Scheduling
Planning a project schedule is crucial to project success, and as such, there are a few steps to follow.
It is an iterative process and you’ll need to update the schedule regularly once work gets underway.
A solid schedule depends on inputs and data such as:
-
The project charter
-
The project management plan
-
Lessons Learned
-
The work breakdown structure
-
Existing templates or scheduling software
-
A list of assumptions and constraints.
Save time by gathering as many inputs and data sources as possible before planning the schedule.
To plan the schedule, you’ll:
-
Define the activities needed to deliver the project.
-
Sequence the activities in a logical, efficient way.
-
Estimate the duration and resources for each activity.
-
Create a timeline using a scheduling technique.
-
Review and revise the schedule with the team and stakeholders.
1. Define the Activities
In this step, focus on activities (tasks), the efforts needed to complete a work package.
The aim is to develop three important outputs:
-
The Activity List, which outlines the activities required for the project.
-
Activity Attributes, a description of each activity, including requirements, dependencies, and effort.
-
The Milestone List, a list of important outputs or dates in a project.
At this stage, you may not have enough information to plan every activity in detail. If this is the case, use rolling wave planning or progressive elaboration.
Put simply, plan work due in the short-term in as much detail as possible and plan work due later at a higher level.
Update the details, along with the activity list and activity attributes document, as more data becomes available.
With that in mind, how do you plan project activities?
Start with the project charter and the project management plan to ensure you understand the scope and goals of the project, resources, stakeholder expectations, and risks.
Next, run a planning session with your team to identify activities and work packages for key deliverables and expected duration based on previous experiences.
It’s also a good idea to check if team members are working on multiple projects or have any upcoming vacation.
If available, check the work breakdown structure (WBS) for further information on tasks and work packages.
The WBS describes key project deliverables and the work needed to get there. The document is part of scope planning and management.
The WBS is not a replacement for a schedule but it is a useful input for this step.
Using the various inputs, create the activity list, activity attributes, and milestone list.
2. Sequence Activities in a Logical Way
Next, identity, map, and document the relationships – dependencies – between project activities.
A project dependency occurs when a task, milestone, or activity is dependent on another task or milestone being completed before it can start or be completed.
Dependencies can create project risks; a delay to one task can impact dependent tasks and the overall schedule.
Understanding dependencies is key to sequencing, prioritizing, and resourcing activities.
There are four types of dependency relationships:
-
Finish-to-start (FS): An activity cannot start until the predecessor activity is complete. Using the example of a cake, you need to bake the cake before decorating it.
-
Start-to-start (SS): An activity cannot start until the predecessor activity is started. The tasks start at the same time but can finish at different times. Here, you can start to bake the cake and make the icing at the same time.
-
Finish-to-finish (FF): An activity cannot finish until the predecessor activity is complete. The tasks can start and finish at different times, for example, the cake must be decorated before delivery.
-
Start-to-finish (SF): An activity cannot finish until the successor activity is started. Before you can bill your customer, you must deliver the decorated cake.
The Precedence Diagraming Method (PDM) is a useful technique when mapping dependencies.
PDM represents activities as a node, which are linked together to show the sequence of work.
This quick video from Online PM Courses explains everything you need to know about project dependencies!
3. Estimate Durations
At this point, you can start to assign durations to activities.
There are several techniques you can apply to your data and inputs:
-
Analogous Estimating and Parametric Estimating use historical data from past projects as a reference point. Analogous Estimating provides results faster whilst Parametric Estimating tends to be more accurate.
-
Bottom-up Estimating aggregates the lower-levels of the WBS to calculate the duration of each activity.
It’s also vital to ask your team and subject matter experts for input as they may have completed similar work in the past.
4. Develop the Schedule
There are a few ways to develop the project schedule.
The Critical Path Method
The Critical Path Method estimates the minimum project duration by identifying the longest path through the project.
In other words, you need to figure the longest sequence of tasks (start and end dates) needed to complete the project.
Tasks that cannot be delayed, or that have no ‘float’, are referred to as critical activities and must be completed on time. This is the critical path.
Resource Optimization
Resource Optimization techniques ensure the start and finish dates of activities match resource availability.
-
Resource Leveling: Adjust the start/end dates based on resource constraints, for example, if a key resource is not available at the right time.
-
Resource Smoothing: Adjust the start/end dates so that resource requirements do not exceed predefined limits.
Schedule Compression
Schedule Compression is used to shorten or accelerate the project without reducing the scope.
This includes:
-
Crashing: Add more resources. This increases project costs and can lead to communication issues as new team members join at different phases.
-
Fast-tracking: Activities that are normally completed in sequence are performed in parallel. This can lead to mistakes and reduced quality.
Agile Methods
For more details on Agile approaches, see our article, How to Plan an Agile Sprint.
5. Review and Revise with the Team and Stakeholders
Before the schedule is finalized, ask your team and stakeholders to review your work.
To make things easier, use your project management software to present the schedule in a visual format such as a Gantt chart.
During this review, you need to check various details such as:
-
Does every activity have a realistic start and end date?
-
Are dependencies and milestones identified?
-
Is work fairly distributed across the team?
-
Are the allocated resources available when needed?
-
Does the schedule align with the critical path?
Update the schedule as needed before finalizing the details with the project sponsor.
Creating and maintaining the project schedule requires time and experience. The schedule is dynamic and must be updated constantly to reflect the status of the project.
In the next section, you’ll see how BrightWork PPM Software for SharePoint On-Premises makes it easy to plan, monitor, and control the project schedule.
Using BrightWork to Manage the Project Schedule
Work Breakdown Structure
The Task List in a SharePoint project site is ideal for managing the WBS.
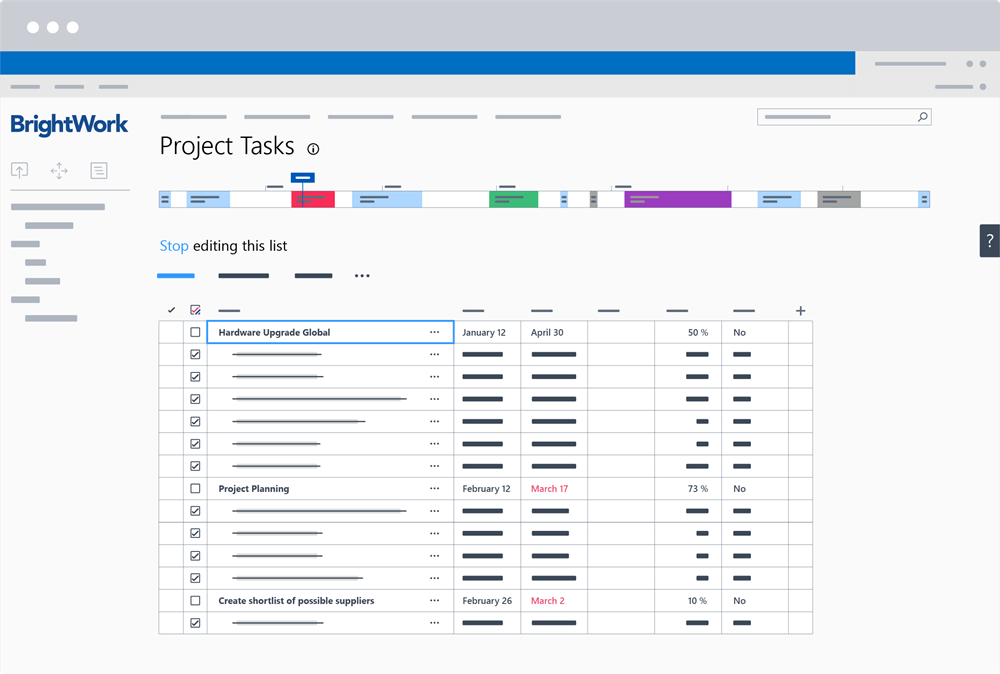
When creating your task list in SharePoint, you can:
-
Add key information such as description, owner, due date, status.
-
Create sub-tasks using the indent/outdent functionality.
-
Add tasks and milestones to a timeline.
-
Edit tasks individually or in bulk.
-
Send email notifications to team members when they are assigned a task.
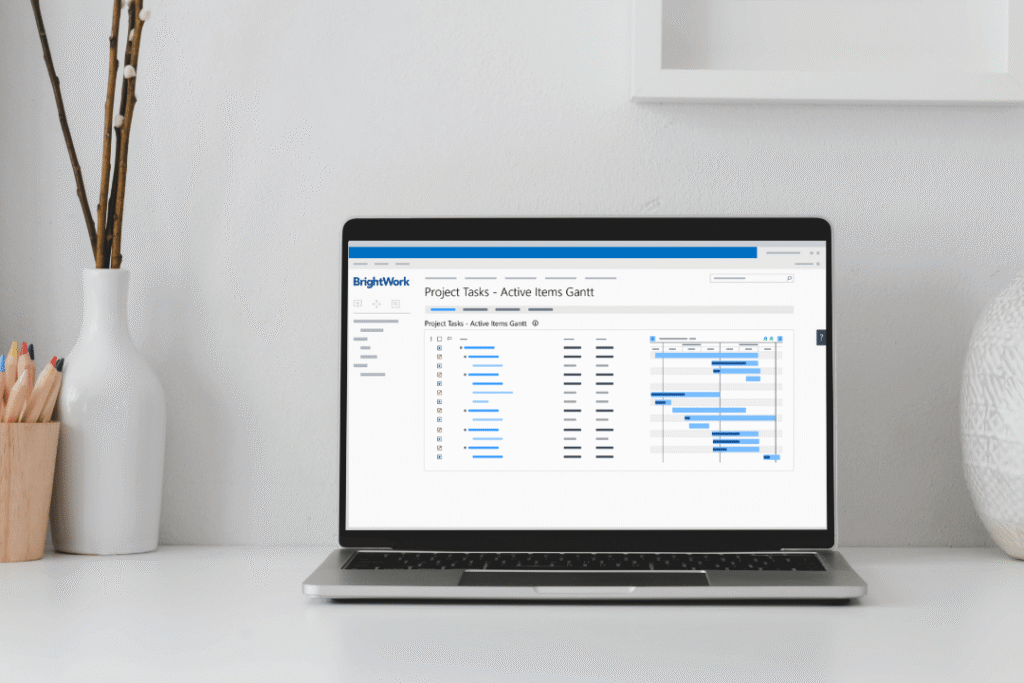
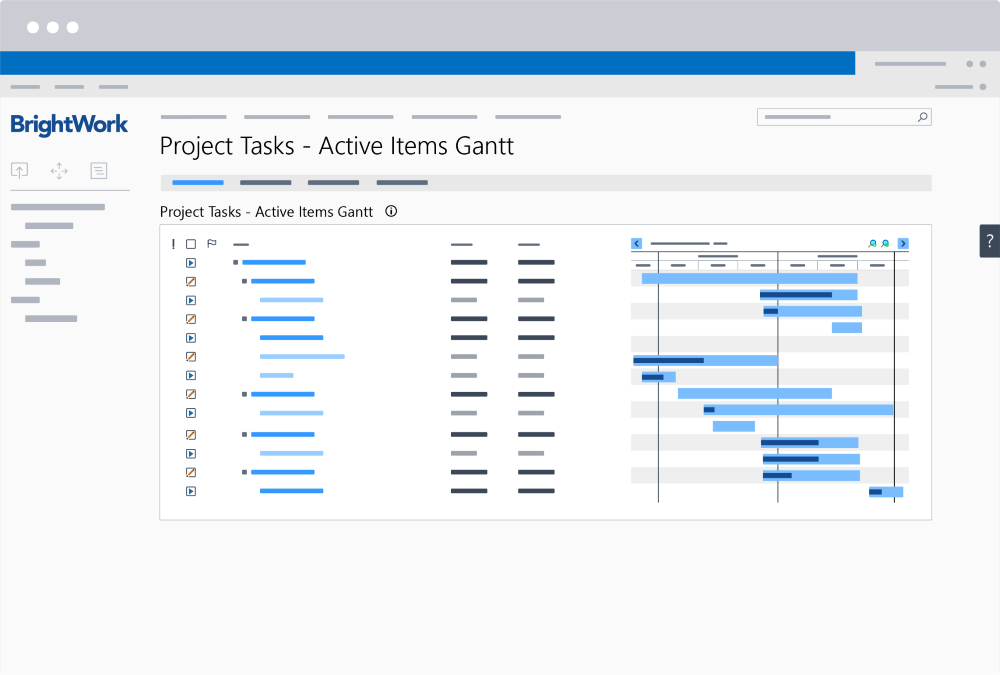
Gantt Chart
A Gantt chart is a horizontal bar chart used to depict a project plan over time. The chart displays key information such as tasks, owners, and dependencies in an easy-to-read way.
The BrightWork Gantt Chart web part is available for project reporting and Portfolio reporting sites.
In-browser Task Scheduler
The In-Browser Task Scheduler makes it easy to calculate the project schedule during the planning phase and to update and recalculate the schedule during execution.
To view this video, please allow Functional cookies.

Enhanced Sync with Microsoft Project Professional
Using the bi-directional sync between SharePoint and Microsoft Project Professional, project managers can update the project schedule in BrightWork and see the results in Project Server and vice versa.
When a team member updates a task in BrightWork, the information is synced with Microsoft Project Server– without the need for additional, expensive licenses.
The Project Structured Template in BrightWork provides an Enhanced Microsoft Project Schedule Sync.
This capability allows project managers to sync extra auto-calculated information into SharePoint such as baselines and variances for work, effort, and cost.
Agile Project Management
A BrightWork project site can be configured for Agile projects by:
-
Using lists to manage the product backlog and plan sprints.
-
Leveraging Agile Boards for task and backlog management.
-
Trackinging work using Sprint Burn Down Charts.
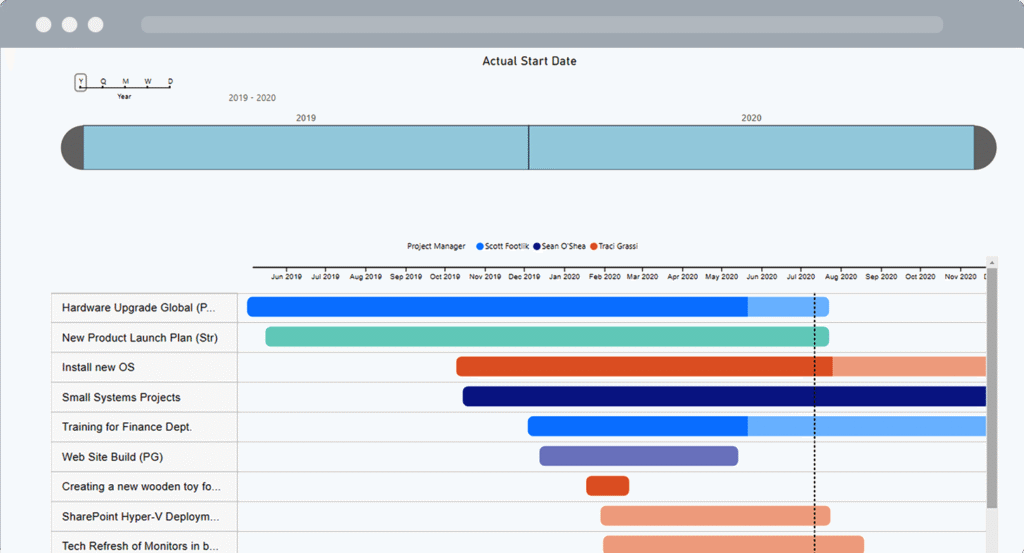
Power BI
The BrightWork Power BI pack for SharePoint On-Premises is a pre-built report with six dashboards for project and portfolio managers.
In terms of managing schedules across projects and portfolios, the pack includes:
-
Portfolio timeline, a Gantt view of all project sites. Drill down by year, quarter, month, week, and days.
-
Project and Task Timeline, a Gantt view of projects and tasks. Filter the data by project name, project type, project manager, and task owner.
-
Work Reports allow project managers to check the status of tasks, risks, issues, and goals.
In addition to schedule management, BrightWork includes several reports to help you track progress and identify potential issues. These include reports and dashboards for Work, Tasks, Issues, and Risks across individual projects and portfolios.