

[et_pb_section fb_built=”1″ _builder_version=”3.22.3″][et_pb_row _builder_version=”3.25″ background_size=”initial” background_position=”top_left” background_repeat=”repeat”][et_pb_column type=”4_4″ _builder_version=”3.25″ custom_padding=”|||” custom_padding__hover=”|||”][et_pb_text _builder_version=”4.9.4″ hover_enabled=”0″ z_index_tablet=”500″ sticky_enabled=”0″]
Having accurate, up-to-date, and accessible project reports is key to understanding project progress and helps the team to make better, more informed decisions. Project reporting with SharePoint creates a ‘one-stop-shop’ for information, improving project and portfolio reporting. It’s also easy to share that information with the relevant audiences in a format that works for them.
Download your free SharePoint project template with reports, metric tiles, and more
In this article, I’ll share four best-practice tips for project reporting on SharePoint with BrightWork. You’ll see how to collect the right data with forms, create tailored reports, use portfolio dashboards, and share reports via email.
4 Ways to Improve Project Reporting with SharePoint
1. Focus on high-quality project data
The saying “garbage in, garbage out” is very true with project reports!
On any project, you will have many people updating and looking for information in the project site.
You’ll need to make sure that all the data entry points are optimized to collect the right information. It’s also important to make this process as easy as possible for your team.
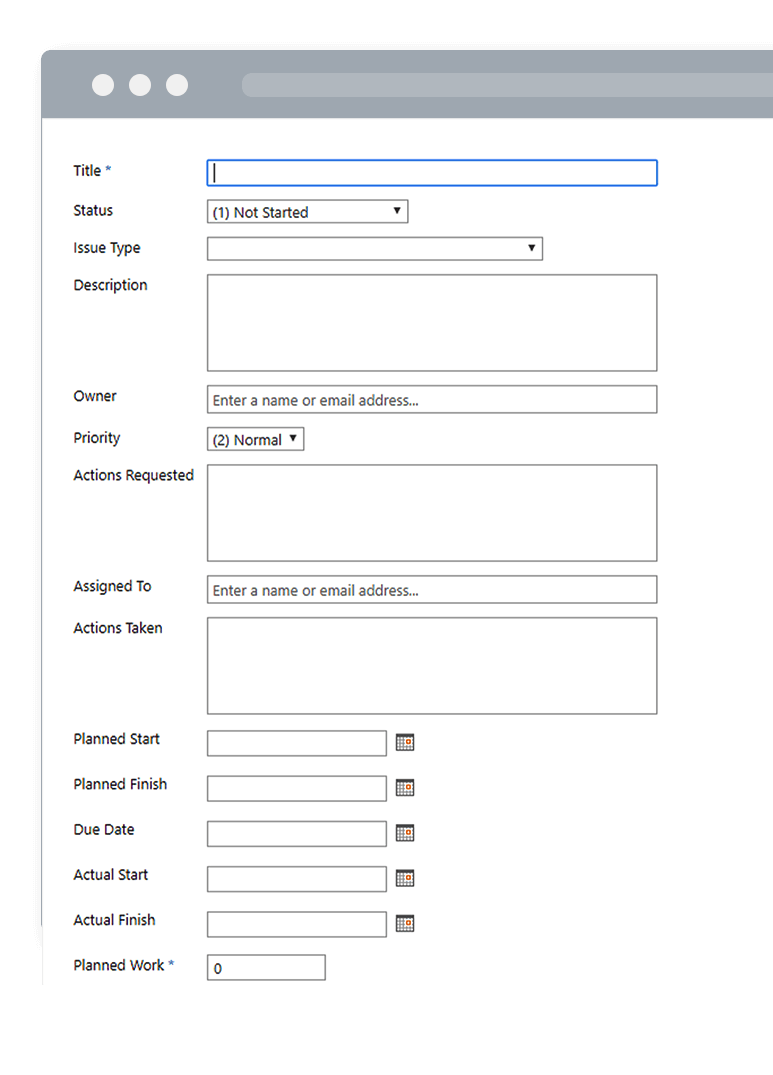
The project sites, forms, and any other deliverables should be set up to guide the project managers and team members to give updates in line with your local practices.
Here is an example of a form for entering an issue that collects the relevant information. Once the data is collected, the information will roll up to other reports and dashboards as needed.
2. Use the right project report for your audience
Everybody working on the project is busy and needs to see different reports.
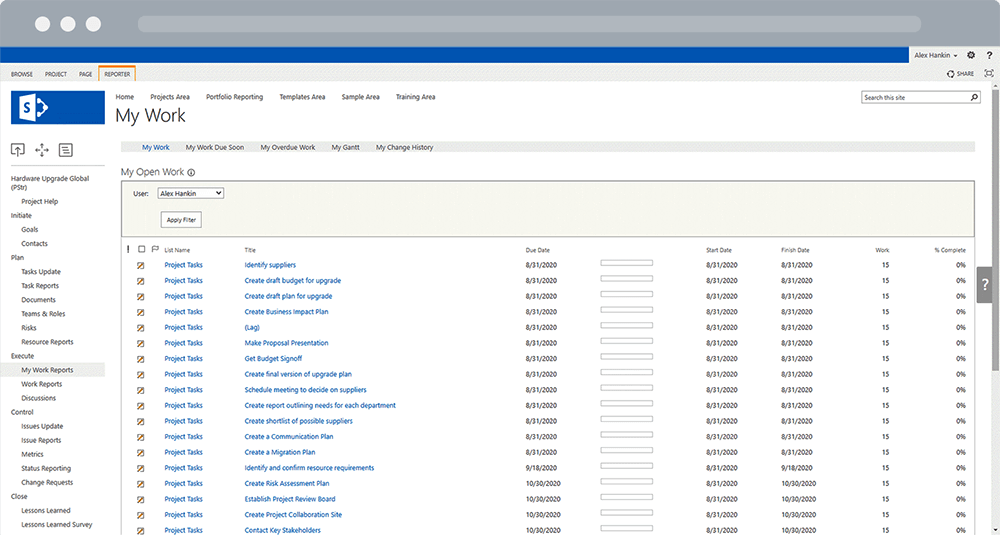
Team members will prefer to get work reports, with upcoming and overdue tasks. The ‘My Work’ is a list of tasks assigned to the logged-in user.
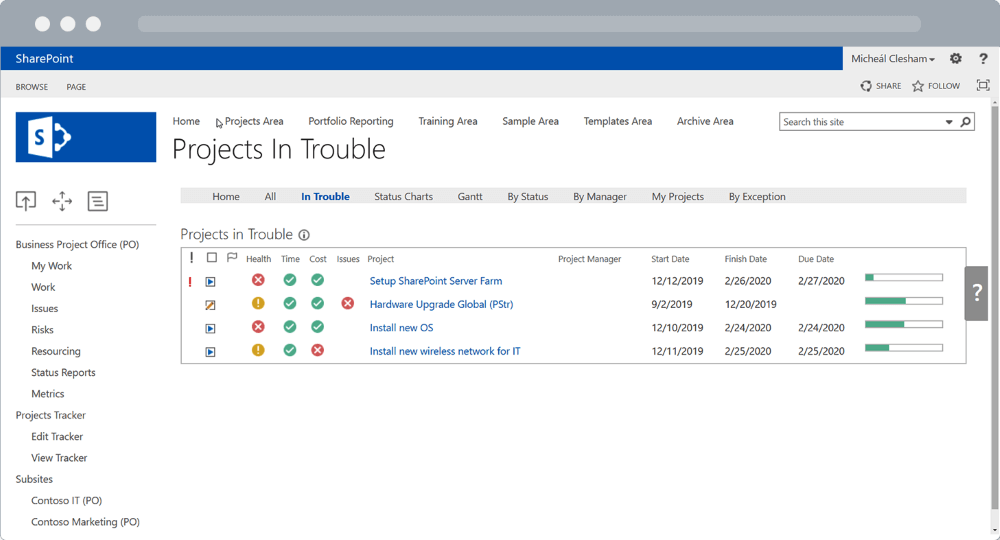
Senior managers often like “one-liners” about active projects, with high-level details about the project’s health and status.
Project managers need various reports for tasks, issues, risks, and so on.
3. Leverage high-level project portfolio reports
Spilling over a bit from the point above, let’s take a closer look at “one-liner” reports for senior managers and stakeholders.
A portfolio dashboard, a single page with roll-up information from all active projects, improves visibility – without increasing administration work.
BrightWork includes two portfolio reporting templates:
Project Office
This template displays real-time data from all projects in the hierarchy in a single dashboard. As reports are updated in individual project sites, this data roll-ups to the relevant dashboards.
Senior executives can easily keep up-to-date with ongoing projects, without having to look for updates!
At any time, users can drill down into a particular project site for more details.
Project Office is frequently used to manage projects in a business unit or department.
Portfolio Reporting
This template allows senior executives to create a personalized dashboard with any combination of projects.
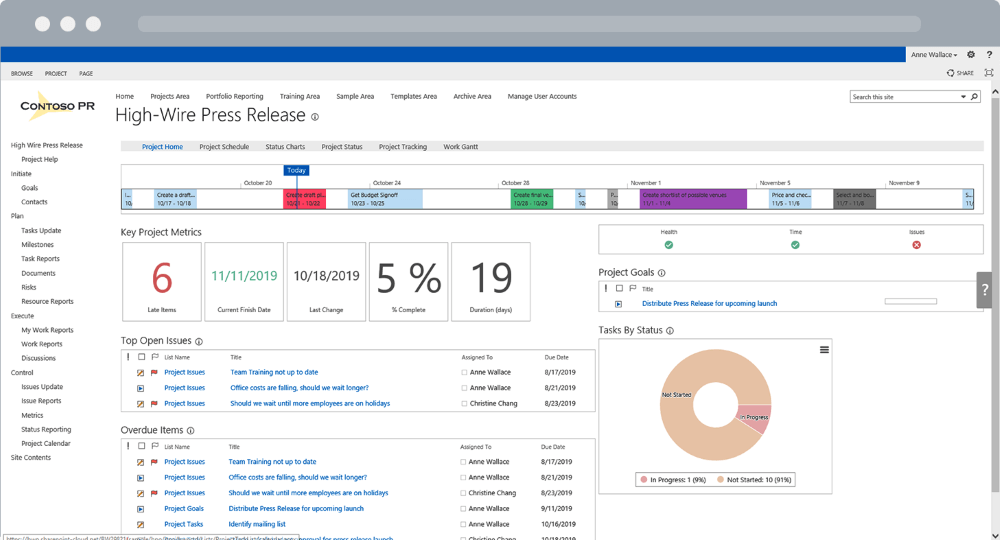
Both templates include dashboards with:
- Project Status Reports and Charts
- Project Gantt / Schedules
- Work Reports and Charts
- Issue and Risk Reports and Charts
- Project Status Reports
- Scorecards of Key Metrics
- Exception and In-Trouble Reports.
https://brightwork.wistia.com/medias/lw6gn53ait?embedType=async&videoFoam=true&videoWidth=640
4. Use automated reminders and notifications
In a perfect world, folks are coming to your SharePoint project management site and checking those updates on their own when they are supposed to. But let’s be realistic, that won’t always be the case!
So you could set up some sort of automatic notifications and alerts, helping to ensure that nothing falls through the cracks.
For example, you could send team members the following prompts:
- Monday: review their open work and upcoming tasks.
- Friday morning: update the progress they’ve made that week. With BrightWork, a team member only has to update an item once, and all reports and dashboards are updated.
On Friday afternoon, all project sponsors and stakeholders receive an automated report of that weeks’ accomplishments that is correct!
https://brightwork.wistia.com/medias/7akp7qq76u?embedType=async&videoFoam=true&videoWidth=640
Next Steps
BrightWork is the easiest way to manage projects and control portfolios on SharePoint On-Premises (server editions of SharePoint 2019, 2016, 2013).
To see what BrightWork can do for your teams, watch our free video demo.
In just 20 minutes, you’ll see key BrightWork features in action like:
- Project Request Management
- Real-time portfolio dashboards
- Flexible project and portfolio templates
- Automated reporting
- Collaborative team sites.
Editor’s Note: This post was originally published in September 2015 and has been updated for freshness, accuracy, and comprehensiveness.
[/et_pb_text][/et_pb_column][/et_pb_row][/et_pb_section]