
This is the fourth part of a multipart series on managing a website redesign project with the Free SharePoint Project Management Template. Catch up on the previous articles in the series on project initiation, project planning, and project execution.
Your project is not likely running exactly to plan. That is why it is called a plan! In order to get the project back on track, it is important to assess the status of the work, re-plan remaining tasks, and communicate the updates with the team.
There are three ways to track and re-plan your project using SharePoint:
-
Check and understand the project’s progress.
-
Find and manage exceptions.
-
Re-plan the project.
Keep reading to learn how to manage each item in your SharePoint project site.*
How to Track and Re-Plan a Project Using SharePoint
To view this video, please allow Functional cookies.

In the following sections, we’ll take a closer look at project tracking and re-planning.
1. Check and Understand the Project’s Progress
You need to understand the status of the project before any re-planning can take place. The SharePoint Project Management Template is pre-populated with a range of visual reports to help everyone involved in the project understand the status very quickly.
Having a single source of project truth reduces the need for multiple emails and meetings to figure out what is happening.
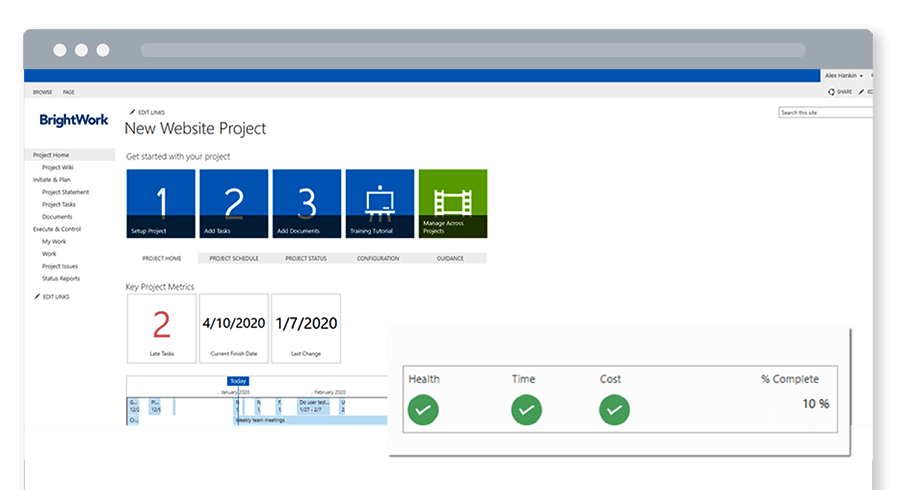
Start your review with the project homepage. Key project metrics (highlighted below) surface late tasks, the current finish date, and the date of the most recent update to the project site.

Simply click on the tile to view the underlying information.
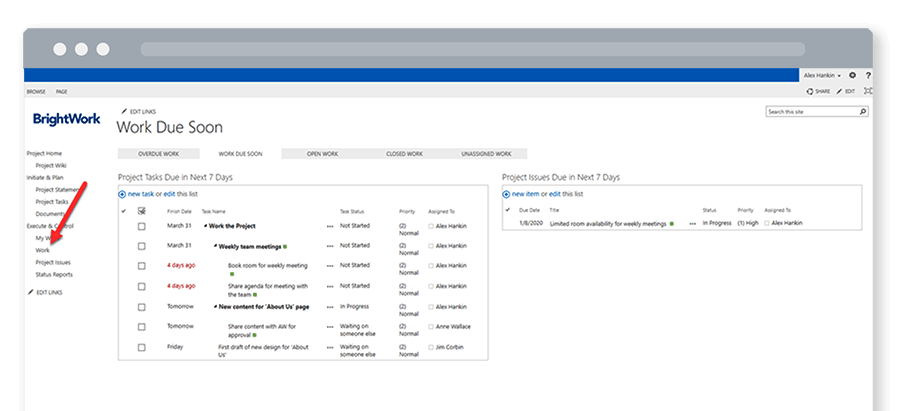
Next, use the Work report to identify problem areas, like overdue or unassigned tasks. An issue has been added regarding room availability for team meetings.
Another way to check issues is the ‘Top Open Issues’ report on the project homepage. This report surfaces all issues on the project. A report on ‘Overdue Items’ is located underneath this list.
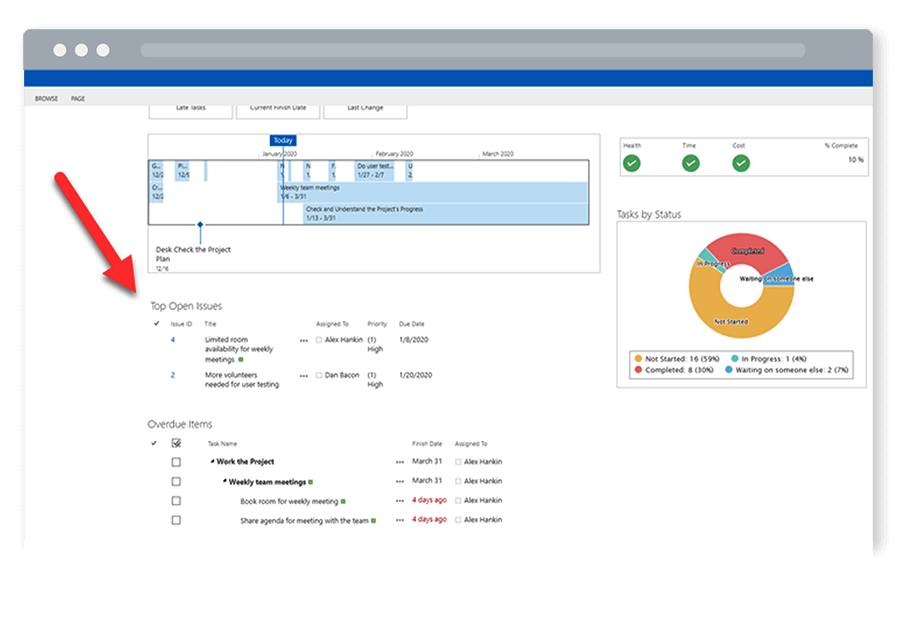
The Red-Yellow-Green status indicators provide at-a-glance insights into the status of the project in terms of Time, Health, or Cost, and percent complete.
2. Find and Manage Exceptions
Before re-planning, check for outstanding exceptions such as issues, risks, and change requests.
Issues are risks identified during project planning which have now become a reality.
Using the ‘Top Open Issues’ report on the project homepage, find and resolve as many issues as possible as these can be the biggest roadblocks in the project schedule.
You should also check work reports for late or unassigned tasks, and deal with these items as needed.
3. Re-Plan the Project
Start re-planning the project by updating each item in the task list as needed – what is in progress, completed, or on hold. Include extra information to the task, such work completed thus far on the task.
Here, you can bulk edit tasks, for example, to change the status of tasks. Firstly, update the status of the first task, and then drag the new status into the other tasks.
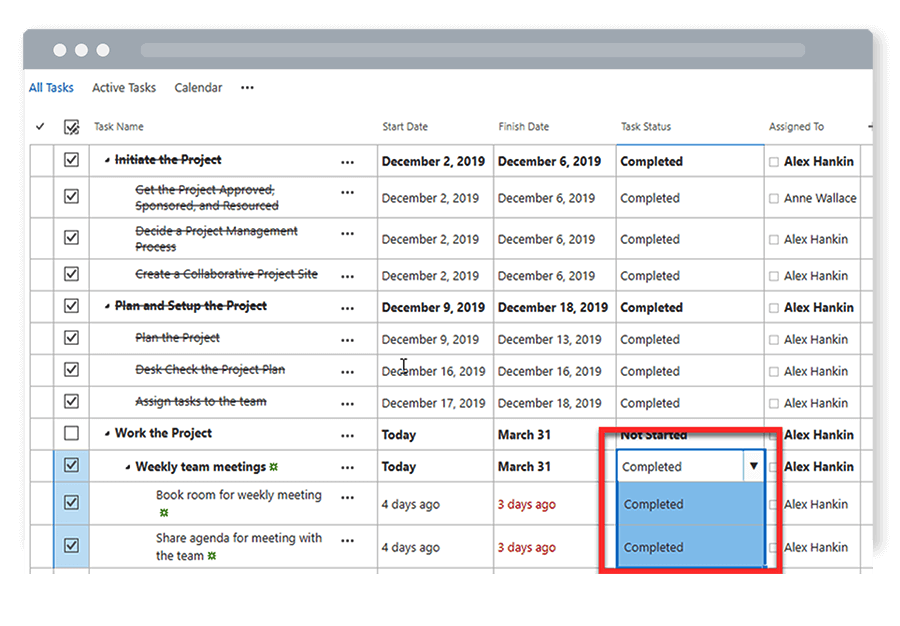
Use the same drag and drop functionality to update the status or owner of tasks as needed.
Once the tasks are updated, a new timeline is generated. It’s important to compare the revised projection against the original plan and share with the sponsor.
If you do change or re-assign project tasks, make sure you inform the relevant team member!
The next step for re-planning the project is to add a project status report, which takes around three minutes to complete.
Add a Project Status Report
A typical Project Status Report includes red-amber-green indicators and captures other information such as details on project issues and items of note. The report adds more context to your project and will help you to track trends over time.
The ‘Project Status’ report is located under the ‘Execute and Control’ section of the Quick Launch.
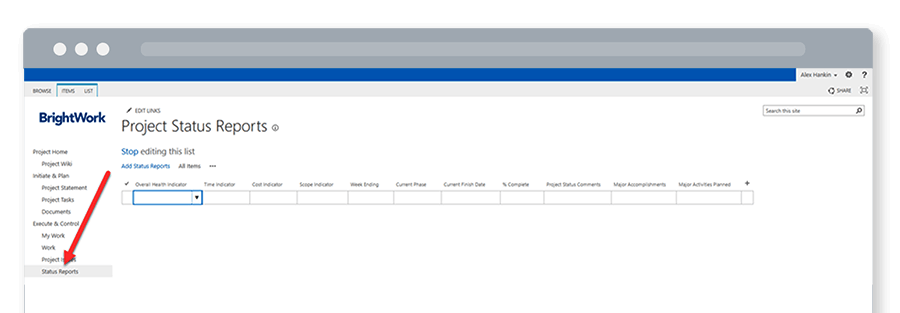
This section also links to previous status reports.
Simply add a new item or click “Edit this list” to add a new status report.
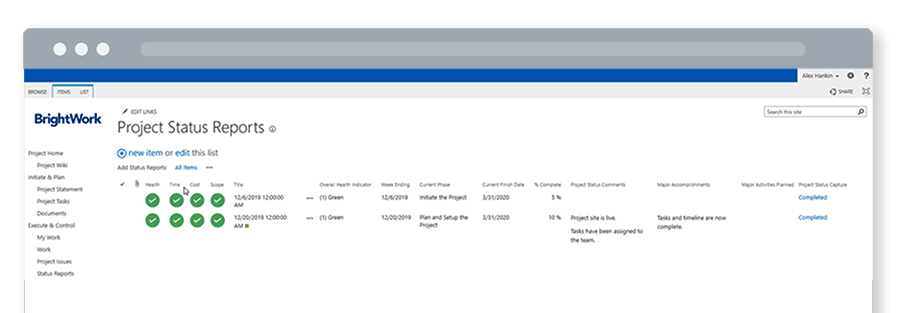
Using the datasheet view, work through each column:
-
Overall health, time, cost – color status
-
Date of report
-
Current project phase
-
Expected finish date
-
% complete
-
Status comment
-
Activities planned.
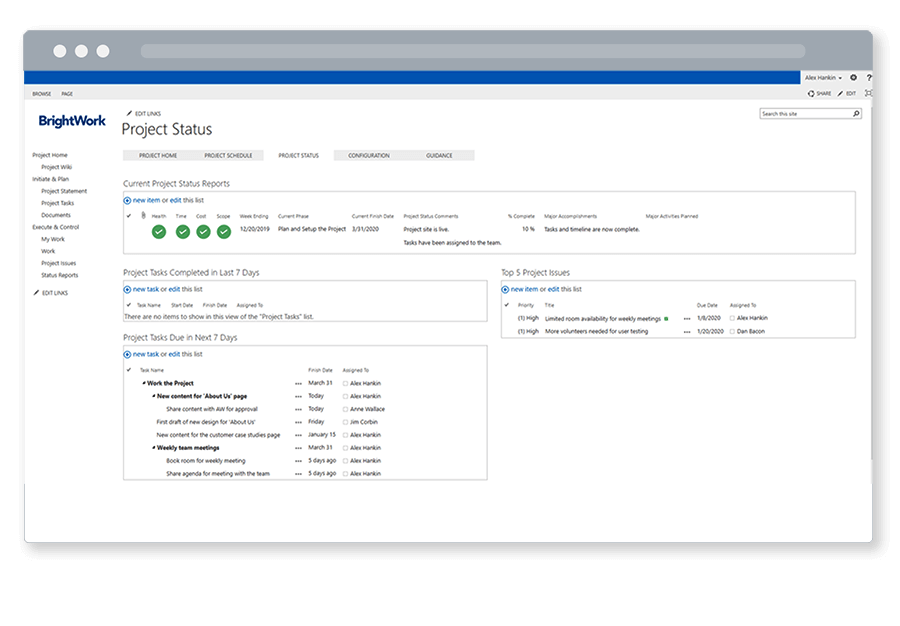
The new information will display on the various reports on the project homepage.
The team can also use the ‘Project Status’ report on the homepage for more detailed information.
Let the team and stakeholders know the project plan and site are updated so they can review the latest timeline.
*You will need to be a site collection administrator to implement the steps in this article. The Free Template is used to create and manage individual project sites.
You can create as many sites as you wish with the template; however, the template does not support cross-project reporting. Learn more about the full BrightWork PPM Solution for SharePoint On-Premises here.
Editor’s Note: This post was originally published in December 2018 and has been updated for freshness, accuracy, and comprehensiveness.