A former project manager colleague of mine once quipped “Project Management…what’s that? My job is Issue Management!” The other project managers and I all had an uncomfortable chuckle and nodded in agreement because it certainly did feel that way at times.
Webinar: 3 Simple Steps for Managing Project Risks in SharePoint
Seems not a week went by that we weren’t trying to put out some project fire (aka “issue”) that flared up.
Although we can’t entirely stop issues from coming our way, we can indeed make them more manageable and visible by introducing SharePoint into the mix.
Gathering Project Issue Data
Before we begin clicking away in SharePoint, let’s come up with some requirements. What kind of metadata about the issue should we capture via columns in our SharePoint list? Here are some starter ideas:
- Title of the issue
- Name of the person who identified the issue (SharePoint person lookup type column)
- Name of the person assigned to resolve the issue (SharePoint person lookup column)
- Priority – suggested choices to allow for sorting later on: (1) High, (2) Normal, (3) Low
- Issue status (choice type column)
- Type of issue (choice type column)
- Full description
- Resolution due date
- Status comments.
Tracking Project Issues in SharePoint
Using the above data, you can now add an ‘Issue Tracking’ list to your site and supplement the included columns with your own, or add these suggested columns to a new custom SharePoint list that you add to your site.
Now that we have dealt with the data requirements, we can move on to creating a useful report – the “Top 5 Open Issues” report. Now when I say “report,” what I’m actually referring to is a list web part that is configured to look very much like a report to end-users. Here goes…
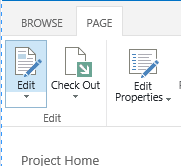
On any page (I recommend the project site home page), go into edit page mode, click on the location where you’d like this report to sit, and click Insert Web Part from the Ribbon; if you’re in a Web Part page then you’ll click on Add Web Part in the desired zone. Choose your project issues list as the part to add.

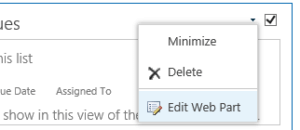
Before you exit the edit page mode, choose to edit the web part, change the Toolbar Type to No Toolbar, change the title of the web part to “Top 5 Open Issues,” and click OK.

Finally, save the page and stop editing.
To finish things off we need to make the added Web Part look more like a report (and less like a regular list Web Part). Click somewhere to the right of the web part title or in the white space of the web part, and in the Ribbon that opens at the top of the page click on ListModify View.
In the configuration screen that appears choose the columns you’d like to display in the report, and to account for the “Top” aspect of the report, sort the report first by Priority and then by Due Date, towards the bottom of the screen in the Item Limit section choose to limit the total number of items displayed to your desired number (for example “5”), filter the view to not show items that have a closed status, and in Tabular View uncheck the option to allow individual checkboxes:
With all that you should now be presented with a “web part report” to provide all of your team members and managers a quick method for discovering project issues that likely require the most attention.
Video
In BrightWork, we’ve enhanced the out-of-the-box risk tracking form in SharePoint with additional fields and reporting capabilities. See the form in action below.
Editor’s Note: This post was originally published in July 2014 and has been updated for freshness, accuracy, and comprehensiveness.


